I plan to finish our garage as a garage/work shop. The walls are about
10 feet high.
Part of the garage is already dry walled, and the drywall is installed
with long side horizontally.
From a handling point of view, it seems that it would be easier to
install it with the long side vertical.
Does it make a difference horizontal or vertical?
It seems it would be easier lifting the panels into place with the long
side vertical, as they could be set and pushed up to the wall. With the
long side horizontal the 2nd row piece would have to be lifted to the
top of the firs row and pushed into place.
I plan to finish our garage as a garage/work shop. The walls are about
10 feet high.
Part of the garage is already dry walled, and the drywall is installed
with long side horizontally.
From a handling point of view, it seems that it would be easier to
install it with the long side vertical.
Does it make a difference horizontal or vertical?
It seems it would be easier lifting the panels into place with the long
side vertical, as they could be set and pushed up to the wall. With the long side horizontal the 2nd row piece would have to be lifted to the
top of the firs row and pushed into place.
On 10/6/2021 10:04 AM, knuttle wrote:
I plan to finish our garage as a garage/work shop. The walls are
about 10 feet high.
Part of the garage is already dry walled, and the drywall is installed
with long side horizontally.
From a handling point of view, it seems that it would be easier to
install it with the long side vertical.
Does it make a difference horizontal or vertical?
It seems it would be easier lifting the panels into place with the
long side vertical, as they could be set and pushed up to the wall.
With the long side horizontal the 2nd row piece would have to be
lifted to the top of the firs row and pushed into place.
So if you are a dry installer, it is probably 6 of one 1/2 a dozen of
the other as to which is easier. Both have to be lifted off of the
floor by an inch or so to reach the ceiling sheetrock.
With that said sheet rock comes in several lengths. Most often the
longer than 8' lengths are placed horizontally if the will is shorter
than the sheet. IIRC sheet rock comes in 8', 10', and 12' lenghts.
On 10/6/2021 1:34 PM, Beeper wrote:
On 10/6/21 10:23 AM, Leon wrote:Thanks for the information. First I am an amateur, but have done some drywall during my high school years 60 years ago.
On 10/6/2021 10:04 AM, knuttle wrote:
I plan to finish our garage as a garage/work shop. The walls are
about 10 feet high.
Part of the garage is already dry walled, and the drywall is
installed with long side horizontally.
From a handling point of view, it seems that it would be easier to
install it with the long side vertical.
Does it make a difference horizontal or vertical?
It seems it would be easier lifting the panels into place with the
long side vertical, as they could be set and pushed up to the wall.
With the long side horizontal the 2nd row piece would have to be
lifted to the top of the firs row and pushed into place.
So if you are a dry installer, it is probably 6 of one 1/2 a dozen of
the other as to which is easier. Both have to be lifted off of the
floor by an inch or so to reach the ceiling sheetrock.
Also consider mudding and taping. Some drywall installers prefer
horizontal seams at about 4' simply to make taping easier. In the end,
it should not matter.
With that said sheet rock comes in several lengths. Most often the
longer than 8' lengths are placed horizontally if the will is shorter
than the sheet. IIRC sheet rock comes in 8', 10', and 12' lenghts.
To use 10' drywall panels in the vertical position would require every
panel to be cut as the walls are a shade under 10'. 10' horizontally
would be good for the first course lifting the second course into place
seems to be a problem even for a younger person
So I was thinking of 8' sheets vertical with one cut sheet horizontally
to complete the wall. Cutting around the window and door would be the
same either way.
On 10/6/2021 2:22 PM, Beeper wrote:
On 10/6/21 11:01 AM, knuttle wrote:Please explain "Avoid any seams at the corners of doors and windows"
On 10/6/2021 1:34 PM, Beeper wrote:
On 10/6/21 10:23 AM, Leon wrote:Thanks for the information.� First I am an amateur, but have done some
On 10/6/2021 10:04 AM, knuttle wrote:
I plan to finish our garage as a garage/work shop.� The walls are
about 10 feet high.
Part of the garage is already dry walled, and the drywall is
installed with long side horizontally.
�From a handling point of view, it seems that it would be easier to >>>>>> install it with the long side vertical.
Does it make a difference horizontal or vertical?
It seems it would be easier lifting the panels into place with the >>>>>> long side vertical, as they could be set and pushed up to the wall. >>>>>> With the long side horizontal the 2nd row piece would have to be
lifted to the top of the firs row and pushed into place.
So if you are a dry installer, it is probably 6 of one 1/2 a dozen
of the other as to which is easier.� Both have to be lifted off of
the floor by an inch or so to reach the ceiling sheetrock.
Also consider mudding and taping. Some drywall installers prefer
horizontal seams at about 4' simply to make taping easier. In the
end, it should not matter.
With that said sheet rock comes in several lengths.� Most often the
longer than 8' lengths are placed horizontally if the will is
shorter than the sheet.� IIRC sheet rock comes in 8', 10', and 12'
lenghts.
drywall during my high school years 60 years ago.
Well then, at your age, I salute you for tackling this yourself!
To use 10' drywall panels in the vertical position would require every
panel to be cut as the walls are a shade under 10'. 10' horizontally
would be good for the first course lifting the second course into
place seems to be a problem even for a younger person
If you don't have a helper, consider renting a drywall hoist for ~$30-40
per day. It may pay for itself in saved time and frustration doing it
yourself.
So I was thinking of 8' sheets vertical with one cut sheet
horizontally to complete the wall.� Cutting around the window and door
would be the same either way.
That's your call based on your situation. Avoid any seams at the corners
of doors and windows and be mindful of the next step; make mudding and
taping the seams as easy as possible. Good luck.
Should all the window/door corners be cut from a single panel or is it
OK to run a panel up along the window and a piece over the window with
seam continuing from the top of he window to the ceiling?
On 10/6/2021 2:22 PM, Beeper wrote:
On 10/6/21 11:01 AM, knuttle wrote:Please explain "Avoid any seams at the corners of doors and windows"
On 10/6/2021 1:34 PM, Beeper wrote:
On 10/6/21 10:23 AM, Leon wrote:Thanks for the information. First I am an amateur, but have done
On 10/6/2021 10:04 AM, knuttle wrote:
I plan to finish our garage as a garage/work shop. The walls are >>>>>> about 10 feet high.
Part of the garage is already dry walled, and the drywall is
installed with long side horizontally.
From a handling point of view, it seems that it would be easier
to install it with the long side vertical.
Does it make a difference horizontal or vertical?
It seems it would be easier lifting the panels into place with the >>>>>> long side vertical, as they could be set and pushed up to the
wall. With the long side horizontal the 2nd row piece would have
to be lifted to the top of the firs row and pushed into place.
So if you are a dry installer, it is probably 6 of one 1/2 a dozen
of the other as to which is easier. Both have to be lifted off of
the floor by an inch or so to reach the ceiling sheetrock.
Also consider mudding and taping. Some drywall installers prefer
horizontal seams at about 4' simply to make taping easier. In the
end, it should not matter.
With that said sheet rock comes in several lengths. Most often the >>>>> longer than 8' lengths are placed horizontally if the will is
shorter than the sheet. IIRC sheet rock comes in 8', 10', and 12'
lenghts.
some drywall during my high school years 60 years ago.
Well then, at your age, I salute you for tackling this yourself!
To use 10' drywall panels in the vertical position would require
every panel to be cut as the walls are a shade under 10'. 10'
horizontally would be good for the first course lifting the second
course into place seems to be a problem even for a younger person
If you don't have a helper, consider renting a drywall hoist for
~$30-40 per day. It may pay for itself in saved time and frustration
doing it yourself.
So I was thinking of 8' sheets vertical with one cut sheet
horizontally to complete the wall. Cutting around the window and
door would be the same either way.
That's your call based on your situation. Avoid any seams at the
corners of doors and windows and be mindful of the next step; make
mudding and taping the seams as easy as possible. Good luck.
Should all the window/door corners be cut from a single panel or is it
OK to run a panel up along the window and a piece over the window with
seam continuing from the top of he window to the ceiling?
On 10/6/2021 2:22 PM, Beeper wrote:
On 10/6/21 11:01 AM, knuttle wrote:
On 10/6/2021 1:34 PM, Beeper wrote:
On 10/6/21 10:23 AM, Leon wrote:Thanks for the information. First I am an amateur, but have done some
On 10/6/2021 10:04 AM, knuttle wrote:
I plan to finish our garage as a garage/work shop. The walls are
about 10 feet high.
Part of the garage is already dry walled, and the drywall is
installed with long side horizontally.
From a handling point of view, it seems that it would be easier to >>>>> install it with the long side vertical.
Does it make a difference horizontal or vertical?
It seems it would be easier lifting the panels into place with the >>>>> long side vertical, as they could be set and pushed up to the wall. >>>>> With the long side horizontal the 2nd row piece would have to be
lifted to the top of the firs row and pushed into place.
So if you are a dry installer, it is probably 6 of one 1/2 a dozen
of the other as to which is easier. Both have to be lifted off of
the floor by an inch or so to reach the ceiling sheetrock.
Also consider mudding and taping. Some drywall installers prefer
horizontal seams at about 4' simply to make taping easier. In the
end, it should not matter.
With that said sheet rock comes in several lengths. Most often the
longer than 8' lengths are placed horizontally if the will is
shorter than the sheet. IIRC sheet rock comes in 8', 10', and 12'
lenghts.
drywall during my high school years 60 years ago.
Well then, at your age, I salute you for tackling this yourself!
To use 10' drywall panels in the vertical position would require every
panel to be cut as the walls are a shade under 10'. 10' horizontally
would be good for the first course lifting the second course into
place seems to be a problem even for a younger person
If you don't have a helper, consider renting a drywall hoist for ~$30-40 per day. It may pay for itself in saved time and frustration doing it yourself.
So I was thinking of 8' sheets vertical with one cut sheet
horizontally to complete the wall. Cutting around the window and door
would be the same either way.
That's your call based on your situation. Avoid any seams at the cornersPlease explain "Avoid any seams at the corners of doors and windows"
of doors and windows and be mindful of the next step; make mudding and taping the seams as easy as possible. Good luck.
Should all the window/door corners be cut from a single panel or is it
OK to run a panel up along the window and a piece over the window with
seam continuing from the top of he window to the ceiling?
On 10/6/2021 3:44 PM, hubops@ccanoemail.ca wrote:
On Wed, 6 Oct 2021 15:18:05 -0400, knuttleI asked here instead of what I found on Google as I had specific
<keith_nuttle@sbcglobal.net> wrote:
On 10/6/2021 2:22 PM, Beeper wrote:
On 10/6/21 11:01 AM, knuttle wrote:Please explain "Avoid any seams at the corners of doors and windows"
On 10/6/2021 1:34 PM, Beeper wrote:
On 10/6/21 10:23 AM, Leon wrote:Thanks for the information.� First I am an amateur, but have done some >>>>> drywall during my high school years 60 years ago.
On 10/6/2021 10:04 AM, knuttle wrote:
I plan to finish our garage as a garage/work shop.� The walls are >>>>>>>> about 10 feet high.
Part of the garage is already dry walled, and the drywall is
installed with long side horizontally.
�From a handling point of view, it seems that it would be easier to >>>>>>>> install it with the long side vertical.
Does it make a difference horizontal or vertical?
It seems it would be easier lifting the panels into place with the >>>>>>>> long side vertical, as they could be set and pushed up to the wall. >>>>>>>> With the long side horizontal the 2nd row piece would have to be >>>>>>>> lifted to the top of the firs row and pushed into place.
So if you are a dry installer, it is probably 6 of one 1/2 a dozen >>>>>>> of the other as to which is easier.� Both have to be lifted off of >>>>>>> the floor by an inch or so to reach the ceiling sheetrock.
Also consider mudding and taping. Some drywall installers prefer
horizontal seams at about 4' simply to make taping easier. In the
end, it should not matter.
With that said sheet rock comes in several lengths.� Most often the >>>>>>> longer than 8' lengths are placed horizontally if the will is
shorter than the sheet.� IIRC sheet rock comes in 8', 10', and 12' >>>>>>> lenghts.
Well then, at your age, I salute you for tackling this yourself!
To use 10' drywall panels in the vertical position would require every >>>>> panel to be cut as the walls are a shade under 10'. 10' horizontally >>>>> would be good for the first course lifting the second course into
place seems to be a problem even for a younger person
If you don't have a helper, consider renting a drywall hoist for ~$30-40 >>>> per day. It may pay for itself in saved time and frustration doing it
yourself.
So I was thinking of 8' sheets vertical with one cut sheet
horizontally to complete the wall.� Cutting around the window and door >>>>> would be the same either way.
That's your call based on your situation. Avoid any seams at the corners >>>> of doors and windows and be mindful of the next step; make mudding and >>>> taping the seams as easy as possible. Good luck.
Should all the window/door corners be cut from a single panel or is it
OK to run a panel up along the window and a piece over the window with
seam continuing from the top of he window to the ceiling?
just 1 link - below - a google search reveals
umteen hits and youtube videos - you name it.
https://www.renovation-headquarters.com/drywall-installation-openings.htmlx >>
John T.
question about hanging dry wall. The video seem to always give general >information.
Again thank you all for the information.
On 10/6/21 11:01 AM, knuttle wrote:
On 10/6/2021 1:34 PM, Beeper wrote:
On 10/6/21 10:23 AM, Leon wrote:
On 10/6/2021 10:04 AM, knuttle wrote:
I plan to finish our garage as a garage/work shop.� The walls are
about 10 feet high.
Part of the garage is already dry walled, and the drywall is
installed with long side horizontally.
�From a handling point of view, it seems that it would be easier to
install it with the long side vertical.
Does it make a difference horizontal or vertical?
It seems it would be easier lifting the panels into place with the
long side vertical, as they could be set and pushed up to the wall.
With the long side horizontal the 2nd row piece would have to be
lifted to the top of the firs row and pushed into place.
So if you are a dry installer, it is probably 6 of one 1/2 a dozen of
the other as to which is easier.� Both have to be lifted off of the
floor by an inch or so to reach the ceiling sheetrock.
Also consider mudding and taping. Some drywall installers prefer
horizontal seams at about 4' simply to make taping easier. In the end,
it should not matter.
Thanks for the information.� First I am an amateur, but have done some
With that said sheet rock comes in several lengths.� Most often the
longer than 8' lengths are placed horizontally if the will is shorter
than the sheet.� IIRC sheet rock comes in 8', 10', and 12' lenghts.
drywall during my high school years 60 years ago.
Well then, at your age, I salute you for tackling this yourself!
To use 10' drywall panels in the vertical position would require every
panel to be cut as the walls are a shade under 10'. 10' horizontally
would be good for the first course lifting the second course into place
seems to be a problem even for a younger person
If you don't have a helper, consider renting a drywall hoist for ~$30-40
per day. It may pay for itself in saved time and frustration doing it >yourself.
I plan to finish our garage as a garage/work shop. The walls are about 10 >feet high.
Part of the garage is already dry walled, and the drywall is installed with >long side horizontally.
From a handling point of view, it seems that it would be easier to install
it with the long side vertical.
Does it make a difference horizontal or vertical?
On 10/6/2021 2:22 PM, Beeper wrote:That is to be avoided if possible - better to have the vertical seam
On 10/6/21 11:01 AM, knuttle wrote:Please explain "Avoid any seams at the corners of doors and windows"
On 10/6/2021 1:34 PM, Beeper wrote:
On 10/6/21 10:23 AM, Leon wrote:Thanks for the information.� First I am an amateur, but have done some
On 10/6/2021 10:04 AM, knuttle wrote:
I plan to finish our garage as a garage/work shop.� The walls are
about 10 feet high.
Part of the garage is already dry walled, and the drywall is
installed with long side horizontally.
�From a handling point of view, it seems that it would be easier to >>>>>> install it with the long side vertical.
Does it make a difference horizontal or vertical?
It seems it would be easier lifting the panels into place with the >>>>>> long side vertical, as they could be set and pushed up to the wall. >>>>>> With the long side horizontal the 2nd row piece would have to be
lifted to the top of the firs row and pushed into place.
So if you are a dry installer, it is probably 6 of one 1/2 a dozen
of the other as to which is easier.� Both have to be lifted off of
the floor by an inch or so to reach the ceiling sheetrock.
Also consider mudding and taping. Some drywall installers prefer
horizontal seams at about 4' simply to make taping easier. In the
end, it should not matter.
With that said sheet rock comes in several lengths.� Most often the
longer than 8' lengths are placed horizontally if the will is
shorter than the sheet.� IIRC sheet rock comes in 8', 10', and 12'
lenghts.
drywall during my high school years 60 years ago.
Well then, at your age, I salute you for tackling this yourself!
To use 10' drywall panels in the vertical position would require every
panel to be cut as the walls are a shade under 10'. 10' horizontally
would be good for the first course lifting the second course into
place seems to be a problem even for a younger person
If you don't have a helper, consider renting a drywall hoist for ~$30-40
per day. It may pay for itself in saved time and frustration doing it
yourself.
So I was thinking of 8' sheets vertical with one cut sheet
horizontally to complete the wall.� Cutting around the window and door
would be the same either way.
That's your call based on your situation. Avoid any seams at the corners
of doors and windows and be mindful of the next step; make mudding and
taping the seams as easy as possible. Good luck.
Should all the window/door corners be cut from a single panel or is it
OK to run a panel up along the window and a piece over the window with
seam continuing from the top of he window to the ceiling?
On 10/6/2021 1:34 PM, Beeper wrote:Do yourself a favour - lay it horisontal. 2 man job - but make or
On 10/6/21 10:23 AM, Leon wrote:Thanks for the information. First I am an amateur, but have done some >drywall during my high school years 60 years ago.
On 10/6/2021 10:04 AM, knuttle wrote:
I plan to finish our garage as a garage/work shop.� The walls are
about 10 feet high.
Part of the garage is already dry walled, and the drywall is
installed with long side horizontally.
�From a handling point of view, it seems that it would be easier to
install it with the long side vertical.
Does it make a difference horizontal or vertical?
It seems it would be easier lifting the panels into place with the
long side vertical, as they could be set and pushed up to the wall.
With the long side horizontal the 2nd row piece would have to be
lifted to the top of the firs row and pushed into place.
So if you are a dry installer, it is probably 6 of one 1/2 a dozen of
the other as to which is easier.� Both have to be lifted off of the
floor by an inch or so to reach the ceiling sheetrock.
Also consider mudding and taping. Some drywall installers prefer
horizontal seams at about 4' simply to make taping easier. In the end,
it should not matter.
With that said sheet rock comes in several lengths.� Most often the
longer than 8' lengths are placed horizontally if the will is shorter
than the sheet.� IIRC sheet rock comes in 8', 10', and 12' lenghts.
To use 10' drywall panels in the vertical position would require every
panel to be cut as the walls are a shade under 10'. 10' horizontally
would be good for the first course lifting the second course into place
seems to be a problem even for a younger person
So I was thinking of 8' sheets vertical with one cut sheet horizontally
to complete the wall. Cutting around the window and door would be the
same either way.
"knuttle" wrote in message news:sjkdtu$7mb$1@dont-email.me...
I plan to finish our garage as a garage/work shop. The walls are about 10 >>feet high.
Part of the garage is already dry walled, and the drywall is installed with >>long side horizontally.
From a handling point of view, it seems that it would be easier to install >>it with the long side vertical.
Does it make a difference horizontal or vertical?
Regarding your question. From a structural standpoint no. However, generally >you have fewer linear feet to tape with horizontal hanging but not always.
Me... I've hung and taped a fair amount of drywall. In your case I'd
probably hang 4'x12' sheets horizontally. Start with 4' widths at the top
and put the nominal 2' at the bottom. If you are working alone you can
hang the upper sheets using a panel lift--they aren't just for ceilings! You >can reach the horizontal joints fairly easy at those heights for taping and >there is less taping to do.
Depending on where the door(s) are located you might be able to avoid having >to tape at least some butt joints.
"knuttle" wrote in message news:sjkdtu$7mb$1@dont-email.me...
I plan to finish our garage as a garage/work shop. The walls are about 10 >>feet high.
Part of the garage is already dry walled, and the drywall is installed with >>long side horizontally.
From a handling point of view, it seems that it would be easier to install >>it with the long side vertical.
Does it make a difference horizontal or vertical?
Regarding your question. From a structural standpoint no.
On Wed, 6 Oct 2021 14:01:47 -0400, knuttle
<keith_nuttle@sbcglobal.net> wrote:
On 10/6/2021 1:34 PM, Beeper wrote:Do yourself a favour - lay it horisontal. 2 man job - but make or
On 10/6/21 10:23 AM, Leon wrote:Thanks for the information. First I am an amateur, but have done some
On 10/6/2021 10:04 AM, knuttle wrote:
I plan to finish our garage as a garage/work shop. The walls are
about 10 feet high.
Part of the garage is already dry walled, and the drywall is
installed with long side horizontally.
From a handling point of view, it seems that it would be easier to >>>>> install it with the long side vertical.
Does it make a difference horizontal or vertical?
It seems it would be easier lifting the panels into place with the
long side vertical, as they could be set and pushed up to the wall.
With the long side horizontal the 2nd row piece would have to be
lifted to the top of the firs row and pushed into place.
So if you are a dry installer, it is probably 6 of one 1/2 a dozen of
the other as to which is easier. Both have to be lifted off of the
floor by an inch or so to reach the ceiling sheetrock.
Also consider mudding and taping. Some drywall installers prefer
horizontal seams at about 4' simply to make taping easier. In the end,
it should not matter.
With that said sheet rock comes in several lengths. Most often the
longer than 8' lengths are placed horizontally if the will is shorter
than the sheet. IIRC sheet rock comes in 8', 10', and 12' lenghts.
drywall during my high school years 60 years ago.
To use 10' drywall panels in the vertical position would require every
panel to be cut as the walls are a shade under 10'. 10' horizontally
would be good for the first course lifting the second course into place
seems to be a problem even for a younger person
So I was thinking of 8' sheets vertical with one cut sheet horizontally
to complete the wall. Cutting around the window and door would be the
same either way.
rent a "llift" - it can be as simple as a set of "ramps" made of 2X4s
against the wall with a 2X4 between them to rest the sheet on at the
right hight to hold the sheet pretty well to the ceiling -use a wide
bar to hold to the desired heigt then screw into place - top sheet
first all around the garage. When the top is all done re-work the ramp
to fit the second sheet - staggering the vertical joints - then cut
the bottom sheet and pry it into place. withthe required bottom gap. Horizontal lines are easier to mud and less conspicuous. Short
vericals are easier than full height
Does it make a difference horizontal or vertical?
It seems it would be easier lifting the panels into place with the long
side vertical, as they could be set and pushed up to the wall. With the
long side horizontal the 2nd row piece would have to be lifted to the
top of the firs row and pushed into place.
With that said sheet rock comes in several lengths. Most often the
longer than 8' lengths are placed horizontally if the will is shorter
than the sheet. IIRC sheet rock comes in 8', 10', and 12' lenghts.
John Grossbohlin <nospam.grossboj@nospam.earthlink.net> wrote:
"knuttle" wrote in message news:sjkdtu$7mb$1@dont-email.me...
I plan to finish our garage as a garage/work shop. The walls are about 10 >>> feet high.
Part of the garage is already dry walled, and the drywall is installed with >>> long side horizontally.
From a handling point of view, it seems that it would be easier to install >>> it with the long side vertical.
Does it make a difference horizontal or vertical?
Regarding your question. From a structural standpoint no.
Drywall can work as a shear wall for earthquake reinforcement. Specific
types of plywood are normally used in proper retrofits, but AFAIU drywall
can work well enough depending on the requirements and the drywall specs.
For plywood shear walls, horizontal panels are preferred, even where you can fit full, evenly spaced panels in either direction. The experimental
evidence (the specifics of which I forget) is much weaker than the
rationales contractors give, but the evidence still slightly favors horizontal placement. My neighbor retrofit his first floor a year after I
did and boasted (based on his contractor's feel-good BS) that his panels
were placed horizontal, unlike mine which were placed vertical. In our situations it almost certainly didn't matter. Rather I'm sure placement was in actuality dictated by which was easier and cheaper for the contractor.
But *technically* I felt bound to concede his point and nod my head.
At least as important as the drywall specs, and definitely more important than direction, would be the fastener type, spec, and placement. For plywood retrofit shearwalls, screws are considered a conspicuous sign of shoddy
work. But I'm sure screws could still be used as long as they met the right specs; screws just aren't as fool- and defect-proof as nails. Maybe the reverse is true for drywall, with screws making it easier to achieve maximum benefit.
On 10/7/2021 12:57 AM, William Ahern wrote:
John Grossbohlin <nospam.grossboj@nospam.earthlink.net> wrote:+
"knuttle" wrote in message news:sjkdtu$7mb$1@dont-email.me...
I plan to finish our garage as a garage/work shop. The walls are about 10 >>>> feet high.
Part of the garage is already dry walled, and the drywall is installed with
long side horizontally.
From a handling point of view, it seems that it would be easier to install >>>> it with the long side vertical.
Does it make a difference horizontal or vertical?
Regarding your question. From a structural standpoint no.
Drywall can work as a shear wall for earthquake reinforcement. Specific
types of plywood are normally used in proper retrofits, but AFAIU drywall
can work well enough depending on the requirements and the drywall specs.
For plywood shear walls, horizontal panels are preferred, even where you can >> fit full, evenly spaced panels in either direction. The experimental
evidence (the specifics of which I forget) is much weaker than the
rationales contractors give, but the evidence still slightly favors
horizontal placement. My neighbor retrofit his first floor a year after I
did and boasted (based on his contractor's feel-good BS) that his panels
were placed horizontal, unlike mine which were placed vertical. In our
situations it almost certainly didn't matter. Rather I'm sure placement was >> in actuality dictated by which was easier and cheaper for the contractor.
But *technically* I felt bound to concede his point and nod my head.
At least as important as the drywall specs, and definitely more important
than direction, would be the fastener type, spec, and placement. For plywood >> retrofit shearwalls, screws are considered a conspicuous sign of shoddy
work. But I'm sure screws could still be used as long as they met the right >> specs; screws just aren't as fool- and defect-proof as nails. Maybe the
reverse is true for drywall, with screws making it easier to achieve maximum >> benefit.
What is an earth quake? ;~)
On Thu, 7 Oct 2021 08:14:25 -0500, Leon <lcb11211@swbelldotnet> wrote:
On 10/7/2021 12:57 AM, William Ahern wrote:
John Grossbohlin <nospam.grossboj@nospam.earthlink.net> wrote:+
"knuttle" wrote in message news:sjkdtu$7mb$1@dont-email.me...
I plan to finish our garage as a garage/work shop. The walls are about 10
feet high.
Part of the garage is already dry walled, and the drywall is installed with
long side horizontally.
From a handling point of view, it seems that it would be easier to install
it with the long side vertical.
Does it make a difference horizontal or vertical?
Regarding your question. From a structural standpoint no.
Drywall can work as a shear wall for earthquake reinforcement. Specific
types of plywood are normally used in proper retrofits, but AFAIU drywall >>> can work well enough depending on the requirements and the drywall specs. >>>
For plywood shear walls, horizontal panels are preferred, even where you can
fit full, evenly spaced panels in either direction. The experimental
evidence (the specifics of which I forget) is much weaker than the
rationales contractors give, but the evidence still slightly favors
horizontal placement. My neighbor retrofit his first floor a year after I >>> did and boasted (based on his contractor's feel-good BS) that his panels >>> were placed horizontal, unlike mine which were placed vertical. In our
situations it almost certainly didn't matter. Rather I'm sure placement was >>> in actuality dictated by which was easier and cheaper for the contractor. >>> But *technically* I felt bound to concede his point and nod my head.
At least as important as the drywall specs, and definitely more important >>> than direction, would be the fastener type, spec, and placement. For plywood
retrofit shearwalls, screws are considered a conspicuous sign of shoddy
work. But I'm sure screws could still be used as long as they met the right >>> specs; screws just aren't as fool- and defect-proof as nails. Maybe the
reverse is true for drywall, with screws making it easier to achieve maximum
benefit.
What is an earth quake? ;~)
2 ounces Cognac
1 ounce absinthe
Garnish: lemon twist
On 10/7/2021 8:49 AM, krw@notreal.com wrote:Yo mean the ones that need a mixture of vofka and orange juice to
On Thu, 7 Oct 2021 08:14:25 -0500, Leon <lcb11211@swbelldotnet> wrote:
On 10/7/2021 12:57 AM, William Ahern wrote:
John Grossbohlin <nospam.grossboj@nospam.earthlink.net> wrote:+
"knuttle" wrote in message news:sjkdtu$7mb$1@dont-email.me...
I plan to finish our garage as a garage/work shop. The walls are about 10
feet high.
Part of the garage is already dry walled, and the drywall is installed with
long side horizontally.
From a handling point of view, it seems that it would be easier to install
it with the long side vertical.
Does it make a difference horizontal or vertical?
Regarding your question. From a structural standpoint no.
Drywall can work as a shear wall for earthquake reinforcement. Specific >>>> types of plywood are normally used in proper retrofits, but AFAIU drywall >>>> can work well enough depending on the requirements and the drywall specs. >>>>
For plywood shear walls, horizontal panels are preferred, even where you can
fit full, evenly spaced panels in either direction. The experimental
evidence (the specifics of which I forget) is much weaker than the
rationales contractors give, but the evidence still slightly favors
horizontal placement. My neighbor retrofit his first floor a year after I >>>> did and boasted (based on his contractor's feel-good BS) that his panels >>>> were placed horizontal, unlike mine which were placed vertical. In our >>>> situations it almost certainly didn't matter. Rather I'm sure placement was
in actuality dictated by which was easier and cheaper for the contractor. >>>> But *technically* I felt bound to concede his point and nod my head.
At least as important as the drywall specs, and definitely more important >>>> than direction, would be the fastener type, spec, and placement. For plywood
retrofit shearwalls, screws are considered a conspicuous sign of shoddy >>>> work. But I'm sure screws could still be used as long as they met the right
specs; screws just aren't as fool- and defect-proof as nails. Maybe the >>>> reverse is true for drywall, with screws making it easier to achieve maximum
benefit.
What is an earth quake? ;~)
2 ounces Cognac
1 ounce absinthe
Garnish: lemon twist
ohhhhh. But what about all those special fasteners. LOL
John Grossbohlin <nospam.grossboj@nospam.earthlink.net> wrote:I wouls NEVER nail drywall. Screws can cause pops too, but nails
"knuttle" wrote in message news:sjkdtu$7mb$1@dont-email.me...
I plan to finish our garage as a garage/work shop. The walls are about 10 >>>feet high.
Part of the garage is already dry walled, and the drywall is installed with >>>long side horizontally.
From a handling point of view, it seems that it would be easier to install >>>it with the long side vertical.
Does it make a difference horizontal or vertical?
Regarding your question. From a structural standpoint no.
Drywall can work as a shear wall for earthquake reinforcement. Specific
types of plywood are normally used in proper retrofits, but AFAIU drywall
can work well enough depending on the requirements and the drywall specs.
For plywood shear walls, horizontal panels are preferred, even where you can >fit full, evenly spaced panels in either direction. The experimental
evidence (the specifics of which I forget) is much weaker than the
rationales contractors give, but the evidence still slightly favors >horizontal placement. My neighbor retrofit his first floor a year after I
did and boasted (based on his contractor's feel-good BS) that his panels
were placed horizontal, unlike mine which were placed vertical. In our >situations it almost certainly didn't matter. Rather I'm sure placement was >in actuality dictated by which was easier and cheaper for the contractor.
But *technically* I felt bound to concede his point and nod my head.
At least as important as the drywall specs, and definitely more important >than direction, would be the fastener type, spec, and placement. For plywood >retrofit shearwalls, screws are considered a conspicuous sign of shoddy
work. But I'm sure screws could still be used as long as they met the right >specs; screws just aren't as fool- and defect-proof as nails. Maybe the >reverse is true for drywall, with screws making it easier to achieve maximum >benefit.
On 10/7/2021 8:55 AM, Dave in SoTex wrote:
On 10/6/2021 12:34 PM, Beeper wrote:This is something we definitely will not have to worry about We are
With that said sheet rock comes in several lengths. Most often the
longer than 8' lengths are placed horizontally if the will is
shorter than the sheet. IIRC sheet rock comes in 8', 10', and 12'
lenghts.
Tearing out wet drywall after Tropical Storm Allison dropped up
to 24 inches of rain [IIRC] in 24 hours, flooded hundreds/thousands of
Houston area homes in 2002 we quickly realized that horizontally
installed drywall made for a convenient height/break for tear-out and
replacement of full sheets. Highest waterline of the five houses we
repaired was 31 or 32 inches. It definitely moved the time line for
tear-out and dry-out.
Dave in SoTex
about 80' above a creek that runs through a swamp that is over a half
mile wide. It we get flooded, many people will be looking for the dove.
On 10/7/2021 8:55 AM, Dave in SoTex wrote:
On 10/6/2021 12:34 PM, Beeper wrote:
With that said sheet rock comes in several lengths. Most often the
longer than 8' lengths are placed horizontally if the will is shorter
than the sheet. IIRC sheet rock comes in 8', 10', and 12' lenghts.
Tearing out wet drywall after Tropical Storm Allison dropped up to
24 inches of rain [IIRC] in 24 hours, flooded hundreds/thousands of
Houston area homes in 2002 we quickly realized that horizontally
installed drywall made for a convenient height/break for tear-out and replacement of full sheets. Highest waterline of the five houses we repaired was 31 or 32 inches. It definitely moved the time line for tear-out and dry-out.
Dave in SoTex
This is something we definitely will not have to worry about We are
about 80' above a creek that runs through a swamp that is over a half
mile wide. It we get flooded, many people will be looking for the dove.
One thing to think about is the sight line. Hung horizontally, you
may see the joint because you're looking right down it's length. Avoid
the seam at eye level (2' panel on the bottom) or you will see it no
matter how good the taping is.
On Wed, 6 Oct 2021 21:30:41 -0400, "John Grossbohlin" ><nospam.grossboj@nospam.earthlink.net> wrote:
"knuttle" wrote in message news:sjkdtu$7mb$1@dont-email.me...It''s not very common to have more than 8 or 10 feet between corners
I plan to finish our garage as a garage/work shop. The walls are about >>>10
feet high.
Part of the garage is already dry walled, and the drywall is installed >>>with
long side horizontally.
From a handling point of view, it seems that it would be easier to >>>install
it with the long side vertical.
Does it make a difference horizontal or vertical?
Regarding your question. From a structural standpoint no. However, >>generally
you have fewer linear feet to tape with horizontal hanging but not always.
Me... I've hung and taped a fair amount of drywall. In your case I'd >>probably hang 4'x12' sheets horizontally. Start with 4' widths at the top >>and put the nominal 2' at the bottom. If you are working alone you can >>hang the upper sheets using a panel lift--they aren't just for ceilings! >>You
can reach the horizontal joints fairly easy at those heights for taping
and
there is less taping to do.
Depending on where the door(s) are located you might be able to avoid >>having
to tape at least some butt joints.
and windows or doors so in MOST cases there is no vertical joint in
the "eye level" panets when mounting horizontal. If there is, a
staggered vertical joint is not terribly visible. A full height
vertical joint every 4 feet is a royal B---h to hide - - . Making the
joints -if required - on the upper course cantered above doors or
windows makes for a nice short vertical seam and the sides of the
windows draw your eye away from the joint -= and it is unusual to
require more than one joint in ther upper course even using the
readily available 8 foot sheets (most walls are under 16 feet long)
On 10/7/2021 11:21 AM, knuttle wrote:
On 10/7/2021 8:55 AM, Dave in SoTex wrote:
On 10/6/2021 12:34 PM, Beeper wrote:This is something we definitely will not have to worry about We are
With that said sheet rock comes in several lengths.� Most often the
longer than 8' lengths are placed horizontally if the will is
shorter than the sheet.� IIRC sheet rock comes in 8', 10', and 12'
lenghts.
�����Tearing out wet drywall after Tropical Storm Allison dropped up
to 24 inches of rain [IIRC] in 24 hours, flooded hundreds/thousands of
Houston area homes in 2002 we quickly realized that horizontally
installed drywall made for a convenient height/break for tear-out and
replacement of full sheets.� Highest waterline of the five houses we
repaired was 31 or 32 inches.� It definitely moved the time line for
tear-out and dry-out.
Dave in SoTex
about 80' above a creek that runs through a swamp that is over a half
mile wide.� It we get flooded, many people will be looking for the dove.
I don't know your particular situation but never say never. 4 years ago >hurricane Harvey then tropical storm Harvey brought 50+ inches of rain
in a 3 day period to the Houston metro area.
While you may be 80' above a creek, that is no guarantee. Although I
would feel safe.
Our home is 65 miles from the gulf coast. Our home is approximately 98' >above sea level. 3 times our street filled with water during the
heaviest rains on the 3rd day. Streets were pretty much flooded all the
way to the coast.
The probability of flooding is all dependent on how much rain or
draining water from other areas that you get and how fast it can drain.
It took 2 weeks for parts of Houston to fully drain.
Best bet is to look at water shed maps for your area.
wrote in message news:8r6slgdmutsnb02u928281g7bk6g90r0i5@4ax.com...
One thing to think about is the sight line. Hung horizontally, you
may see the joint because you're looking right down it's length. Avoid
the seam at eye level (2' panel on the bottom) or you will see it no
matter how good the taping is.
Putting the 2' piece at the bottom (or top for that matter) leaves you with >the sheets joining at tapered edges... a flat joint. Prefill the joint with >hot mud (setting joint compound) then tape and top coat with at least two >coats. Done well you will not see the joints as they will appear flat. By >pre-filling the gap between panels with hot mud the panels will act as one >piece of drywall and you should not get a bulge or crack over time. The
down side of putting the cut edge at the ceiling is you don't have a
straight factory edge butted against the ceiling... In which case you might >not get as crisp of a corner as a result. Pre-fill the irregularities with >hot mud either way!
If you put the 2' piece in the middle you will have one edge that is not >tapered. That results in what is essentially a butt joint. A butt joint
needs to be floated out a significant distance to hide it.... 2-2 1/2 feet
is not uncommon for a pro and most amateurs cannot do them well.
All that said, the OP is rocking his garage so none of this makes much >difference! ;~)
Even if done right, you will see the seam if you can look straight
down a long wall. Over time, it will only get worse.
On Wednesday, October 6, 2021 at 11:04:33 AM UTC-4, keith_...@sbcglobal.net wrote:out, bottom may be less noticeable. In a workshop it probably doesn't matter.
Does it make a difference horizontal or vertical?
It seems it would be easier lifting the panels into place with the long side vertical, as they could be set and pushed up to the wall. With the long side horizontal the 2nd row piece would have to be lifted to the1. Drywall the ceiling.
top of the firs row and pushed into place.
2. The first sheet for the wall should be placed up tight to the ceiling. This makes a tight joint with a tapered edge for taping and helps support the ceiling sheet.
3. The next sheet goes under the first. For an 8' wall that's it. The inch or so at the bottom will be covered by trim. For a 10' wall you'll have to decide if you want a 2' "patch" in the middle or at the bottom. Middle is easier to work on to feather
Horizontal or vertical is up to you. It may make a difference on how many joints you have to deal with especially (untapered) butt joints. In home construction, many rooms can be finished with 10 or 12 foot sheets covering a full wall and eliminatingthe butt joints.
I cannot understand why so many people are talking about using 2 foot >sections on this wall and whether to put it at the top or bottom. I >think >there are a lot of people who are very unfamiliar with drywall.
Drywall sheets come in thicknesses of 1/4", 3/8", 1/2", and 5/8".
Drywall sheets come in lengths of 8', 9', 10', 12', 14', and I think you
can even get 16' lengths too. Might have to go to a drywall supplier >for >these.
Drywall sheets come in widths of 4', 4.5', and 5'.
Check the drywall section at Menards, Home Depot, Lowes online and you will >find almost all of the sizes I mentioned above. You don't >even have to go >to a specialized drywall supplier. With all the sizes I listed above, all >rooms from 8 to 10 feet high can be drywalled with >two sheets stacked >horizontal. And with sheets of 14' or I think 16', almost all walls can be >covered with one long sheet from corner to >corner. Or to make it easy to >carry by one or two guys, use two 8' lengths with a seam in the middle. >House construction companies and >their supporting drywall makers are all >about fast, cheap, easy. They have figured out long ago to build rooms in >heights and lengths to >standard sizes and to make drywall sheets the
correct sizes to cover those walls quick and easy. Minimizing labor hours >and cost to hang >drywall.
On Thursday, October 7, 2021 at 6:56:44 AM UTC-5, tcr...@yahoo.com wrote:feather out, bottom may be less noticeable. In a workshop it probably doesn't matter.
On Wednesday, October 6, 2021 at 11:04:33 AM UTC-4, keith_...@sbcglobal.net wrote:
Does it make a difference horizontal or vertical?
It seems it would be easier lifting the panels into place with the long side vertical, as they could be set and pushed up to the wall. With the long side horizontal the 2nd row piece would have to be lifted to the top of the firs row and pushed into place.1. Drywall the ceiling.
2. The first sheet for the wall should be placed up tight to the ceiling. This makes a tight joint with a tapered edge for taping and helps support the ceiling sheet.
3. The next sheet goes under the first. For an 8' wall that's it. The inch or so at the bottom will be covered by trim. For a 10' wall you'll have to decide if you want a 2' "patch" in the middle or at the bottom. Middle is easier to work on to
I cannot understand why so many people are talking about using 2 foot sections on this wall and whether to put it at the top or bottom. I think there are a lot of people who are very unfamiliar with drywall.
Drywall sheets come in thicknesses of 1/4", 3/8", 1/2", and 5/8".
Drywall sheets come in lengths of 8', 9', 10', 12', 14', and I think you can even get 16' lengths too. Might have to go to a drywall supplier for these.
Drywall sheets come in widths of 4', 4.5', and 5'.
Check the drywall section at Menards, Home Depot, Lowes online and you will find almost all of the sizes I mentioned above.
wrote in message news:0r9vlg92o466tj5ikg875c620khgjoe64l@4ax.com...
Even if done right, you will see the seam if you can look straight
down a long wall. Over time, it will only get worse.
In my experience, with wood framing the waviness of the wall will likely be >more noticeable than a well hung and taped flat joint...
In new construction that is very common as the framing dries, twists, >shrinks, bows, settles, etc., over time and it is telegraphed through the >drywall.
Careful renovations are another story. This as the framing has generally >normalized and you can make the walls flat and they will stay that way. I've >used a scrub plane to remove the high spots and used shims to fill in the
low spots in the field of the walls. In some cases I also used hot mud to >flatten the framing out. The goal is to create the illusion of flatness in >both the rocking and mudding...
After the rock was hung I've also did some "mud framing" on the surface of >the drywall near the bottom. That was done so that the baseboards would be >straight. Almost nothing looks worse to me in finish carpentry than >baseboards with gaps between them and the wall... or wide globs of chalking.
I've also flattened the ceilings with shimmed furring strips...
Straight framing combined with well hung drywall, prefilling, and carefully >taped joints can look just fine for decades... in a garage it will look >perfect until the day the garage is cleared out to move!
On Thursday, October 7, 2021 at 6:56:44 AM UTC-5, tcr...@yahoo.com wrote:feather out, bottom may be less noticeable. In a workshop it probably doesn't matter.
On Wednesday, October 6, 2021 at 11:04:33 AM UTC-4, keith_...@sbcglobal.net wrote:
1. Drywall the ceiling.
Does it make a difference horizontal or vertical?
It seems it would be easier lifting the panels into place with the long
side vertical, as they could be set and pushed up to the wall. With the
long side horizontal the 2nd row piece would have to be lifted to the
top of the firs row and pushed into place.
2. The first sheet for the wall should be placed up tight to the ceiling. This makes a tight joint with a tapered edge for taping and helps support the ceiling sheet.
3. The next sheet goes under the first. For an 8' wall that's it. The inch or so at the bottom will be covered by trim. For a 10' wall you'll have to decide if you want a 2' "patch" in the middle or at the bottom. Middle is easier to work on to
I cannot understand why so many people are talking about using 2 foot sections on this wall and whether to put it at the top or bottom. I think there are a lot of people who are very unfamiliar with drywall.
Drywall sheets come in thicknesses of 1/4", 3/8", 1/2", and 5/8".
Drywall sheets come in lengths of 8', 9', 10', 12', 14', and I think you can even get 16' lengths too. Might have to go to a drywall supplier for these.
Drywall sheets come in widths of 4', 4.5', and 5'.
Check the drywall section at Menards, Home Depot, Lowes online and you will find almost all of the sizes I mentioned above. You don't even have to go to a specialized drywall supplier. With all the sizes I listed above, all rooms from 8 to 10 feethigh can be drywalled with two sheets stacked horizontal. And with sheets of 14' or I think 16', almost all walls can be covered with one long sheet from corner to corner. Or to make it easy to carry by one or two guys, use two 8' lengths with a seam
On Thursday, October 7, 2021 at 6:56:44 AM UTC-5, tcr...@yahoo.com wrote:feather out, bottom may be less noticeable. In a workshop it probably doesn't matter.
On Wednesday, October 6, 2021 at 11:04:33 AM UTC-4, keith_...@sbcglobal.net wrote:
1. Drywall the ceiling.
Does it make a difference horizontal or vertical?
It seems it would be easier lifting the panels into place with the long
side vertical, as they could be set and pushed up to the wall. With the
long side horizontal the 2nd row piece would have to be lifted to the
top of the firs row and pushed into place.
2. The first sheet for the wall should be placed up tight to the ceiling. This makes a tight joint with a tapered edge for taping and helps support the ceiling sheet.
3. The next sheet goes under the first. For an 8' wall that's it. The inch or so at the bottom will be covered by trim. For a 10' wall you'll have to decide if you want a 2' "patch" in the middle or at the bottom. Middle is easier to work on to
high can be drywalled with two sheets stacked horizontal. And with sheets of 14' or I think 16', almost all walls can be covered with one long sheet from corner to corner. Or to make it easy to carry by one or two guys, use two 8' lengths with a seam
I cannot understand why so many people are talking about using 2 foot sections on this wall and whether to put it at the top or bottom. I think there are a lot of people who are very unfamiliar with drywall.
Drywall sheets come in thicknesses of 1/4", 3/8", 1/2", and 5/8".
Drywall sheets come in lengths of 8', 9', 10', 12', 14', and I think you can even get 16' lengths too. Might have to go to a drywall supplier for these.
Drywall sheets come in widths of 4', 4.5', and 5'.
Check the drywall section at Menards, Home Depot, Lowes online and you will find almost all of the sizes I mentioned above. You don't even have to go to a specialized drywall supplier. With all the sizes I listed above, all rooms from 8 to 10 feet
On Fri, 8 Oct 2021 00:51:23 -0400, "John Grossbohlin" <nospam.grossboj@nospam.earthlink.net> wrote:
wrote in message news:0r9vlg92o466tj5ikg875c620khgjoe64l@4ax.com...
Even if done right, you will see the seam if you can look straight
down a long wall. Over time, it will only get worse.
In my experience, with wood framing the waviness of the wall will likely be >> more noticeable than a well hung and taped flat joint...
In new construction that is very common as the framing dries, twists,
shrinks, bows, settles, etc., over time and it is telegraphed through the
drywall.
Careful renovations are another story. This as the framing has generally
normalized and you can make the walls flat and they will stay that way. I've >> used a scrub plane to remove the high spots and used shims to fill in the
low spots in the field of the walls. In some cases I also used hot mud to
flatten the framing out. The goal is to create the illusion of flatness in >> both the rocking and mudding...
After the rock was hung I've also did some "mud framing" on the surface of >> the drywall near the bottom. That was done so that the baseboards would be >> straight. Almost nothing looks worse to me in finish carpentry than
baseboards with gaps between them and the wall... or wide globs of chalking. >>
I've also flattened the ceilings with shimmed furring strips...
I've done that with floors and have thought about it for walls but
thought I was being anal.
Best bet is to look at water shed maps for your area.
Do they have your hurricane marked?
On Thursday, October 7, 2021 at 12:21:51 PM UTC-4, keith_nuttle@sbcglobal.net wrote:
On 10/7/2021 8:55 AM, Dave in SoTex wrote:
On 10/6/2021 12:34 PM, Beeper wrote:This is something we definitely will not have to worry about We are
With that said sheet rock comes in several lengths. Most often the
longer than 8' lengths are placed horizontally if the will is shorter >>>>> than the sheet. IIRC sheet rock comes in 8', 10', and 12' lenghts.
Tearing out wet drywall after Tropical Storm Allison dropped up to
24 inches of rain [IIRC] in 24 hours, flooded hundreds/thousands of
Houston area homes in 2002 we quickly realized that horizontally
installed drywall made for a convenient height/break for tear-out and
replacement of full sheets. Highest waterline of the five houses we
repaired was 31 or 32 inches. It definitely moved the time line for
tear-out and dry-out.
Dave in SoTex
about 80' above a creek that runs through a swamp that is over a half
mile wide. It we get flooded, many people will be looking for the dove.
I'm in a similar situation. Roughly 80' almost straight down to the bay
on the east and that same 80' over about a mile to the lake to the north. It's also down hill to the south and west.
One year we got a letter from our mortgage holder informing us that we
were in a FEMA flood zone and that if we didn't buy our own flood insurance, they were authorized to buy it for us.
When I called and started using words like "biblical proportions", they did
a little research and told me that I could ignore the letter. It turns out that
someone made a minor programming error which caused the letter to be
sent to every single one of their mortgagees.
The part that I still wonder about is the fact that it took them 3 months
to send a "retraction" to those of us that received the letter in error. I often
wonder how many people believed the letter and purchased flood insurance during those 3 months. I would hope that the ins co's would tell people that they weren't in a FEMA flood zone and didn't sell them the unnecessary insurance.
On 10/7/2021 9:02 PM, krw@notreal.com wrote:
Snip
Best bet is to look at water shed maps for your area.
Do they have your hurricane marked?
What? Marked?
On Thursday, October 7, 2021 at 6:56:44 AM UTC-5, tcr...@yahoo.com wrote:feather out, bottom may be less noticeable. In a workshop it probably doesn't matter.
On Wednesday, October 6, 2021 at 11:04:33 AM UTC-4, keith_...@sbcglobal.net wrote:
1. Drywall the ceiling.
Does it make a difference horizontal or vertical?
It seems it would be easier lifting the panels into place with the long
side vertical, as they could be set and pushed up to the wall. With the
long side horizontal the 2nd row piece would have to be lifted to the
top of the firs row and pushed into place.
2. The first sheet for the wall should be placed up tight to the ceiling. This makes a tight joint with a tapered edge for taping and helps support the ceiling sheet.
3. The next sheet goes under the first. For an 8' wall that's it. The inch or so at the bottom will be covered by trim. For a 10' wall you'll have to decide if you want a 2' "patch" in the middle or at the bottom. Middle is easier to work on to
high can be drywalled with two sheets stacked horizontal. And with sheets of 14' or I think 16', almost all walls can be covered with one long sheet from corner to corner. Or to make it easy to carry by one or two guys, use two 8' lengths with a seam
I cannot understand why so many people are talking about using 2 foot sections on this wall and whether to put it at the top or bottom. I think there are a lot of people who are very unfamiliar with drywall.
Drywall sheets come in thicknesses of 1/4", 3/8", 1/2", and 5/8".
Drywall sheets come in lengths of 8', 9', 10', 12', 14', and I think you can even get 16' lengths too. Might have to go to a drywall supplier for these.
Drywall sheets come in widths of 4', 4.5', and 5'.
Check the drywall section at Menards, Home Depot, Lowes online and you will find almost all of the sizes I mentioned above. You don't even have to go to a specialized drywall supplier. With all the sizes I listed above, all rooms from 8 to 10 feet
the butt joints.Horizontal or vertical is up to you. It may make a difference on how many joints you have to deal with especially (untapered) butt joints. In home construction, many rooms can be finished with 10 or 12 foot sheets covering a full wall and eliminating
On Friday, October 8, 2021 at 12:45:12 AM UTC-4, russell...@yahoo.com wrote:feather out, bottom may be less noticeable. In a workshop it probably doesn't matter.
On Thursday, October 7, 2021 at 6:56:44 AM UTC-5, tcr...@yahoo.com wrote:
On Wednesday, October 6, 2021 at 11:04:33 AM UTC-4, keith_...@sbcglobal.net wrote:
Does it make a difference horizontal or vertical?
It seems it would be easier lifting the panels into place with the long1. Drywall the ceiling.
side vertical, as they could be set and pushed up to the wall. With the
long side horizontal the 2nd row piece would have to be lifted to the top of the firs row and pushed into place.
2. The first sheet for the wall should be placed up tight to the ceiling. This makes a tight joint with a tapered edge for taping and helps support the ceiling sheet.
3. The next sheet goes under the first. For an 8' wall that's it. The inch or so at the bottom will be covered by trim. For a 10' wall you'll have to decide if you want a 2' "patch" in the middle or at the bottom. Middle is easier to work on to
I cannot understand why so many people are talking about using 2 foot sections on this wall and whether to put it at the top or bottom. I think there are a lot of people who are very unfamiliar with drywall.
Drywall sheets come in thicknesses of 1/4", 3/8", 1/2", and 5/8".
Drywall sheets come in lengths of 8', 9', 10', 12', 14', and I think you can even get 16' lengths too. Might have to go to a drywall supplier for these.
Drywall sheets come in widths of 4', 4.5', and 5'.
Check the drywall section at Menards, Home Depot, Lowes online and you will find almost all of the sizes I mentioned above.I just checked the drywall section on the Home Depot, Lowes & Menards websites. I scrolled
around and also tried their size filters.
Home Depot: The only width they list is 4'.
Lowe's: They list 4' and 4.5'. All three 4.5' products are Unavailable for on-line purchase or in-store pickup.
Menards: They list 4' and 4.5'. The 4.5' appears to be available in 12' lengths only.
Maybe my search skills are fading. Do you have any links for the other sizes that these stores carry?
This is something we definitely will not have to worry about We are
about 80' above a creek that runs through a swamp that is over a half
mile wide. It we get flooded, many people will be looking for the dove
knuttle <keith_nuttle@sbcglobal.net> wrote in >news:sjn6qs$q40$1@dont-email.me:
This is something we definitely will not have to worry about We are
about 80' above a creek that runs through a swamp that is over a half
mile wide. It we get flooded, many people will be looking for the dove
I felt the same way about our house. It was on top of a small hill above a >large plane that fed down to a 30-40' drop off. By the time our house was >affected by rising flood waters, someone would have built an Ark! (The >houses down below would have been completely under water.)
We did have some minor flooding once, though. A storm system dropped like
6" of rain and overwhelmed the soil so water couldn't drain away so
it came in. Two 20 inch box fans and a dehumidifier fixed things right up.
knuttle <keith_nuttle@sbcglobal.net> wrote in news:sjn6qs$q40$1@dont-email.me:
This is something we definitely will not have to worry about We are
about 80' above a creek that runs through a swamp that is over a half
mile wide. It we get flooded, many people will be looking for the dove
I felt the same way about our house. It was on top of a small hill above a large plane that fed down to a 30-40' drop off. By the time our house was affected by rising flood waters, someone would have built an Ark! (The houses down below would have been completely under water.)
We did have some minor flooding once, though. A storm system dropped like
6" of rain and overwhelmed the soil so water couldn't drain away so
it came in. Two 20 inch box fans and a dehumidifier fixed things right up.
Puckdropper
On 10/8/2021 11:45 AM, krw@notreal.com wrote:
On Fri, 8 Oct 2021 00:51:23 -0400, "John Grossbohlin"
<nospam.grossboj@nospam.earthlink.net> wrote:>
Careful renovations are another story. This as the framing has generally >>> normalized and you can make the walls flat and they will stay that way.
I've
used a scrub plane to remove the high spots and used shims to fill in
the
low spots in the field of the walls. In some cases I also used hot mud
to
flatten the framing out. The goal is to create the illusion of flatness
in
both the rocking and mudding...
After the rock was hung I've also did some "mud framing" on the surface
of
the drywall near the bottom. That was done so that the baseboards would
be
straight. Almost nothing looks worse to me in finish carpentry than
baseboards with gaps between them and the wall... or wide globs of
chalking.
I've also flattened the ceilings with shimmed furring strips...
I've done that with floors and have thought about it for walls but
thought I was being anal.
Anal or not, that used to be a common step, called pickup framing, between >the framing going up and the dry wall going up.
On Thu, 7 Oct 2021 21:25:56 -0400, "John Grossbohlin" ><nospam.grossboj@nospam.earthlink.net> wrote:
Putting the 2' piece at the bottom (or top for that matter) leaves you
with
the sheets joining at tapered edges... a flat joint. Prefill the joint
with
hot mud (setting joint compound) then tape and top coat with at least two >>coats. Done well you will not see the joints as they will appear flat. By >>pre-filling the gap between panels with hot mud the panels will act as one >>piece of drywall and you should not get a bulge or crack over time. The >>down side of putting the cut edge at the ceiling is you don't have a >>straight factory edge butted against the ceiling... In which case you
might
not get as crisp of a corner as a result. Pre-fill the irregularities
with
hot mud either way!
Even if done right, you will see the seam if you can look straight
down a long wall. Over time, it will only get worse.
When you say "came in" are you talking about a basement or first
floor?
Builders now do a piss poor job of foundation drainage. I shouldn't
say "now". They weren't doing a great job 60 years ago. My parents'
house did have a sump and pump to deal with foundation drains but the
pump just dumped the water outside on the lawn, where it found its way
back to the foundation drains. At times the pump would run
continuously. The basement in our current house is walk-out so only
buried half way. Drainage isn't a problem.
wrote in message news:0r9vlg92o466tj5ikg875c620khgjoe64l@4ax.com...
On Thu, 7 Oct 2021 21:25:56 -0400, "John Grossbohlin" >><nospam.grossboj@nospam.earthlink.net> wrote:
Putting the 2' piece at the bottom (or top for that matter) leaves you >>>with
the sheets joining at tapered edges... a flat joint. Prefill the joint >>>with
hot mud (setting joint compound) then tape and top coat with at least two >>>coats. Done well you will not see the joints as they will appear flat. By >>>pre-filling the gap between panels with hot mud the panels will act as one >>>piece of drywall and you should not get a bulge or crack over time. The >>>down side of putting the cut edge at the ceiling is you don't have a >>>straight factory edge butted against the ceiling... In which case you >>>might
not get as crisp of a corner as a result. Pre-fill the irregularities >>>with
hot mud either way!
Even if done right, you will see the seam if you can look straight
down a long wall. Over time, it will only get worse.
Just came across this video related to prefilling joints.
https://www.youtube.com/watch?v=2BDgtX38KVM
krw@notreal.com wrote in
news:s6g3mgl87rbec7p9s17ip4hfjo1sd222ab@4ax.com:
When you say "came in" are you talking about a basement or first
floor?
Builders now do a piss poor job of foundation drainage. I shouldn't
say "now". They weren't doing a great job 60 years ago. My parents'
house did have a sump and pump to deal with foundation drains but the
pump just dumped the water outside on the lawn, where it found its way
back to the foundation drains. At times the pump would run
continuously. The basement in our current house is walk-out so only
buried half way. Drainage isn't a problem.
Basement.
Any time you rely on a sump pump, you've got a problem. I just wish more >people would take the time to water proof the basements properly when >building--when it's easy to get at. The new side of the house has
plastic "pebble" board (I don't remember the name), a passive foundation >drain that drains away from the house, and I'm not sure if the cinder
block has a waterproof coating, but that side never gets water in it. It >sure didn't add a whole lot to the cost of the build.
On Mon, 11 Oct 2021 22:34:35 -0400, "John Grossbohlin" ><nospam.grossboj@nospam.earthlink.net> wrote:
wrote in message news:0r9vlg92o466tj5ikg875c620khgjoe64l@4ax.com...
On Thu, 7 Oct 2021 21:25:56 -0400, "John Grossbohlin" >>><nospam.grossboj@nospam.earthlink.net> wrote:
Putting the 2' piece at the bottom (or top for that matter) leaves you >>>>with
the sheets joining at tapered edges... a flat joint. Prefill the joint >>>>with
hot mud (setting joint compound) then tape and top coat with at least two >>>>coats. Done well you will not see the joints as they will appear flat. By >>>>pre-filling the gap between panels with hot mud the panels will act as one >>>>piece of drywall and you should not get a bulge or crack over time. The >>>>down side of putting the cut edge at the ceiling is you don't have a >>>>straight factory edge butted against the ceiling... In which case you >>>>might
not get as crisp of a corner as a result. Pre-fill the irregularities >>>>with
hot mud either way!
Even if done right, you will see the seam if you can look straight
down a long wall. Over time, it will only get worse.
Just came across this video related to prefilling joints.
https://www.youtube.com/watch?v=2BDgtX38KVM
Makes sense but does "pre-filling" mean that you go around and put mud
in all of the joints, then go back and tape or does it mean that you
load the joint with mud then tape over it immediately?
On Tue, 12 Oct 2021 21:20:28 -0500, Markem618 <mark...@hotmail.com>
wrote:
On Tue, 12 Oct 2021 20:51:32 -0400, k...@notreal.com wrote:
On Mon, 11 Oct 2021 22:34:35 -0400, "John Grossbohlin" >><nospam....@nospam.earthlink.net> wrote:
wrote in message news:0r9vlg92o466tj5ik...@4ax.com...
On Thu, 7 Oct 2021 21:25:56 -0400, "John Grossbohlin" >>>><nospam....@nospam.earthlink.net> wrote:
Putting the 2' piece at the bottom (or top for that matter) leaves you >>>>>with
the sheets joining at tapered edges... a flat joint. Prefill the joint >>>>>with
hot mud (setting joint compound) then tape and top coat with at least two
coats. Done well you will not see the joints as they will appear flat. By
pre-filling the gap between panels with hot mud the panels will act as one
piece of drywall and you should not get a bulge or crack over time. The >>>>>down side of putting the cut edge at the ceiling is you don't have a >>>>>straight factory edge butted against the ceiling... In which case you >>>>>might
not get as crisp of a corner as a result. Pre-fill the irregularities >>>>>with
hot mud either way!
Even if done right, you will see the seam if you can look straight >>>>down a long wall. Over time, it will only get worse.
Just came across this video related to prefilling joints.
https://www.youtube.com/watch?v=2BDgtX38KVM
Makes sense but does "pre-filling" mean that you go around and put mud
in all of the joints, then go back and tape or does it mean that you
load the joint with mud then tape over it immediately?
The pros who redid the sunroom, with the framing being a bit wonkyOdd. I thought the tapered edge was to hide the tape and first layer.
taped after filling sanding a first coat but starting with a flat
surface made for a great job.
It sounds like it didn't matter if it was a tapered or butt joint,
they all got treated as butt joints.
YMMV as may your walls.No kidding.
On Tue, 12 Oct 2021 20:51:32 -0400, krw@notreal.com wrote:
On Mon, 11 Oct 2021 22:34:35 -0400, "John Grossbohlin" >><nospam.grossboj@nospam.earthlink.net> wrote:
wrote in message news:0r9vlg92o466tj5ikg875c620khgjoe64l@4ax.com...
On Thu, 7 Oct 2021 21:25:56 -0400, "John Grossbohlin" >>>><nospam.grossboj@nospam.earthlink.net> wrote:
Putting the 2' piece at the bottom (or top for that matter) leaves you >>>>>with
the sheets joining at tapered edges... a flat joint. Prefill the joint >>>>>with
hot mud (setting joint compound) then tape and top coat with at least two >>>>>coats. Done well you will not see the joints as they will appear flat. By >>>>>pre-filling the gap between panels with hot mud the panels will act as one >>>>>piece of drywall and you should not get a bulge or crack over time. The >>>>>down side of putting the cut edge at the ceiling is you don't have a >>>>>straight factory edge butted against the ceiling... In which case you >>>>>might
not get as crisp of a corner as a result. Pre-fill the irregularities >>>>>with
hot mud either way!
Even if done right, you will see the seam if you can look straight
down a long wall. Over time, it will only get worse.
Just came across this video related to prefilling joints.
https://www.youtube.com/watch?v=2BDgtX38KVM
Makes sense but does "pre-filling" mean that you go around and put mud
in all of the joints, then go back and tape or does it mean that you
load the joint with mud then tape over it immediately?
The pros who redid the sunroom, with the framing being a bit wonky
taped after filling sanding a first coat but starting with a flat
surface made for a great job.
YMMV as may your walls.
On Mon, 11 Oct 2021 22:34:35 -0400, "John Grossbohlin" ><nospam.grossboj@nospam.earthlink.net> wrote:
Just came across this video related to prefilling joints.
https://www.youtube.com/watch?v=2BDgtX38KVM
Makes sense but does "pre-filling" mean that you go around and put mud
in all of the joints, then go back and tape or does it mean that you
load the joint with mud then tape over it immediately?
Hanging, I can do. Mudding & taping just isn't in my genes. When I asked
the
guy if my drywall hanging was OK, he said "I'd follow you anytime." ;-)
wrote in message news:o9bcmgtg4c4j96s278f30cphq0tj6ou6sc@4ax.com...
On Mon, 11 Oct 2021 22:34:35 -0400, "John Grossbohlin" >><nospam.grossboj@nospam.earthlink.net> wrote:
Just came across this video related to prefilling joints.
https://www.youtube.com/watch?v=2BDgtX38KVM
Makes sense but does "pre-filling" mean that you go around and put mud
in all of the joints, then go back and tape or does it mean that you
load the joint with mud then tape over it immediately?
Prefilling means to fill the joints, preferably with hot mud (e.g., >Durabond), allowing that to set, and then taping. Hot mud is like plaster, >it hardens through a chemical process and has little to no shrinkage.
You could also prefill with All Purpose mud but, because that is an >evaporative compound, big joints may take a day or more to dry and may
shrink or crack. It is definitely better than not prefilling but it is
slower and big gaps might need another prefill coat.
Pre-filling does a couple things for you. One is that it fills the joint so >that the sheets essentially become one...the gap cannot close up. Another >benefit is that the taping mud under the tape will not shrink into the gap >and leave the tape with a dip. Me, I prefill anything from an 1/8" and >bigger... corners, flat joints, butt joints, walls, ceilings, any thing with >a gap. It goes fast and depending on the setting time of the hot mud you use >you can be taping in 20, 45, 90, ... minutes.
"DerbyDad03" wrote in message
news:0cb74730-eae7-4ebe...@googlegroups.com...
Hanging, I can do. Mudding & taping just isn't in my genes. When I asked >theWhen you are the hanger and taper you watch out for yourself!
guy if my drywall hanging was OK, he said "I'd follow you anytime." ;-)
I've noticed on my current project that hanging booboos and damaged sheets don't freak me out any more. This as I've learned a lot and have gotten a
lot better at taping. I still avoid butt joints when I can by using 12' sheets, but buggered up sheet edges, broken corners, and bad cuts around electrical work boxes don't phase me any more. I also don't end up with the perpetual "the sheet is 1/4" too long" hanging problem as I don't try to
make it exactly fit the space any more! ;~)
Tolerable, but not anything that
I would have accepted had I paid for it.
wrote in message news:o9bcmgtg4c4j96s278f30cphq0tj6ou6sc@4ax.com...
On Mon, 11 Oct 2021 22:34:35 -0400, "John Grossbohlin" >><nospam.grossboj@nospam.earthlink.net> wrote:
Prefilling means to fill the joints, preferably with hot mud (e.g., >>Durabond), allowing that to set, and then taping. Hot mud is like
plaster,
it hardens through a chemical process and has little to no shrinkage.
I like the 90 minute stuff for taping but it is more work. I'm a
rank(est) armature and Durabond doesn't dissolve in water and it's
harder making sanding actually easier. Of course there is some that's
more sandable than others. My problem is mixing enough and not too
much. I don't have a good way to mix it either.
You could also prefill with All Purpose mud but, because that is an >>evaporative compound, big joints may take a day or more to dry and may >>shrink or crack. It is definitely better than not prefilling but it is >>slower and big gaps might need another prefill coat.
Pre-filling does a couple things for you. One is that it fills the joint
so
that the sheets essentially become one...the gap cannot close up. Another >>benefit is that the taping mud under the tape will not shrink into the gap >>and leave the tape with a dip. Me, I prefill anything from an 1/8" and >>bigger... corners, flat joints, butt joints, walls, ceilings, any thing >>with
a gap. It goes fast and depending on the setting time of the hot mud you >>use
you can be taping in 20, 45, 90, ... minutes.
When you prefill do you fill just the gap? It sounded like they were
saying to fill the taper too.
wrote in message news:mb7fmg1pg51to6bclarslnp1und5adg8p5@4ax.com...
On Wed, 13 Oct 2021 21:26:43 -0400, "John Grossbohlin" ><nospam.grossboj@nospam.earthlink.net> wrote:
wrote in message news:o9bcmgtg4c4j96s278f30cphq0tj6ou6sc@4ax.com...
On Mon, 11 Oct 2021 22:34:35 -0400, "John Grossbohlin" >>><nospam.grossboj@nospam.earthlink.net> wrote:
Prefilling means to fill the joints, preferably with hot mud (e.g., >>>Durabond), allowing that to set, and then taping. Hot mud is like >>>plaster,
it hardens through a chemical process and has little to no shrinkage.
I like the 90 minute stuff for taping but it is more work. I'm a
rank(est) armature and Durabond doesn't dissolve in water and it's
harder making sanding actually easier. Of course there is some that's
more sandable than others. My problem is mixing enough and not too
much. I don't have a good way to mix it either.
Durabond isn't known for its sandability... ;~) If you use it for the
prefill and taping, and make it reasonably smooth, you can always finish
with all purpose. Then you can sand easily.
One advantage of using hot mud to tape is you can use the self adhesive mesh >tape. Put the tape up (if it doesn't stick well use spray adhesive) and then >apply the hot mud. Mesh tape is supposed to be used with setting compound, >not the evaporative type. That process might be easier than using paper tape >for some folks.
Me, my current method is to put thinned all purpose or ultra light weight
mud on the tape and then put it in place on the wall/ceiling. At least for >me, that goes much faster and you get an even layer of mud under the tape as >compared to putting the mud on the joint with a knife and then putting the >tape on. I found an in expensive device that works well and is simple to >use... far less complicated than other devices I tried. It's called a >TapeBuddy. Amazon has them.
You could also prefill with All Purpose mud but, because that is an >>>evaporative compound, big joints may take a day or more to dry and may >>>shrink or crack. It is definitely better than not prefilling but it is >>>slower and big gaps might need another prefill coat.
Pre-filling does a couple things for you. One is that it fills the joint >>>so
that the sheets essentially become one...the gap cannot close up. Another >>>benefit is that the taping mud under the tape will not shrink into the gap >>>and leave the tape with a dip. Me, I prefill anything from an 1/8" and >>>bigger... corners, flat joints, butt joints, walls, ceilings, any thing >>>with
a gap. It goes fast and depending on the setting time of the hot mud you >>>use
you can be taping in 20, 45, 90, ... minutes.
When you prefill do you fill just the gap? It sounded like they were >>saying to fill the taper too.
Just the gaps. It makes no sense to me to prefill the taper before taping.
If you did that it would be like taping a butt joint instead of a flat >joint...
Evidently the prefill doesn't have completely fill the gap? It
doesn't seem that there is enough mud on the tape to fill it.
How does TapeBuddy compare with a banjo?
wrote in message news:9pekmg13u9fi5kk1tg3jap5o1hchcvs10g@4ax.com...
On Thu, 14 Oct 2021 22:36:43 -0400, "John Grossbohlin" ><nospam.grossboj@nospam.earthlink.net> wrote:
Evidently the prefill doesn't have completely fill the gap? It
doesn't seem that there is enough mud on the tape to fill it.
The idea is to fill the gaps but not the tapers. If you have very narrow >gaps, or no gaps, there is no need to prefill. Narrow gaps will typically >fill with the taping mud. Some guys advise hanging with bigger gaps or
making the gaps bigger with a knife and prefilling everything.
How does TapeBuddy compare with a banjo?
The same but different animal... ;~) The banjo holds tape and mud and is >carried to the joint and moved along the joint to apply the mudded tape. >Whereas with the TapeBuddy holds the tape and mud and sits on top of a joint >compound bucket (has notches to fit on the bucket) and you pull out a length >of tape and cut it to length (corner of a joint compound knife) and then
move the mudded tape to the joint and apply it. Generally you don't pull out >more than two arms length... multiple pieces to do a long flat joint is no >problem and butt joints are never more and 4.5 feet (unless perhaps you
stuff a narrow piece of rock between two horizontal sheets!). With the >TapeBuddy you are only carrying around the mudded tape and not a bunch of >tape, mud and steel (or aluminum) so it's less fatiguing to use for mere >mortals.
The host of these videos, Ben, is amusing and irreverent and knows what he's >doing even if he's goofing around for the video. The video on the TapeBuddy >also mentions prefilling and opening up the gaps to do so...
https://www.youtube.com/watch?v=rU1vcqklwoA&t=9s vs.
https://www.youtube.com/watch?v=ojyrmm5jIBI&t=309s
On Sat, 16 Oct 2021 18:09:52 -0400, "John Grossbohlin" ><nospam.grossboj@nospam.earthlink.net> wrote:
The host of these videos, Ben, is amusing and irreverent and knows what >>he's
doing even if he's goofing around for the video. The video on the >>TapeBuddy
also mentions prefilling and opening up the gaps to do so...
https://www.youtube.com/watch?v=rU1vcqklwoA&t=9s vs.
I can see that it would take a bit of arm muscle for the banjo. This
was a very good tutorial. I'd like to have seen the outside corner
but youtube is big enough to find it elsewhere.
https://www.youtube.com/watch?v=ojyrmm5jIBI&t=309s
That's really slick. I noticed that he used the quick set chemical
reaction type mud in the first video and the evaporative stuff in the
second. Is there a reason for this (either one)?
He made a comment about not overlapping tape on a butt joint but
didn't say what the alternative was. Just baking sure the tape was
long enough to cover the entire joint? What about ceilings/wall
corners? I also have wall butt joints that go 8'. Perhaps bad
planning but that's how it worked out.
What about ceilings/wall corners? I also have wall butt joints that go 8'. Perhaps bad
planning but that's how it worked out.
On 10/17/2021 9:04 PM, John Grossbohlin wrote:
Once you have the mud up there, you'll do what you have to do to make it work, one piece of tape or three pieces. Just watch a YouTube videoWhat about ceilings/wall corners? I also have wall butt joints that go 8'. Perhaps bad
planning but that's how it worked out.
first. In fact, you may start with one piece, and go back the next day,
rip some off, find that you have three after that. The single thing
which immensely improved the quality of my taping the most was to dunk
the paper tape into water first. After that it got embedded in the mud
"real good"! Before I started doing that, there were places where the
tape dried with air gaps. The single thing I remember learning (from a
book) about inside corners is not to put more mud "in" the corner once
you've taped it the first time. Taping drywall makes me feel like an
artist with a pallet, you just probably wouldn't want to pay me by the
hour! %-) Also remember, usually, nothing that comes off should go back
into the bucket. I read the book "Drywall", by M. Ferguson before my
drywall project. I think I taped my first joint at least 3 times before
I was satisfied--using wet tape the last time! Tape and mud are really
cheap, don't be ashamed to ask for a "do-over"! : ) I'm the same
poster who suggested using a halogen lamp too (after sanding).
I also recommend a sanding pole you can attach to your shop-vac (with appropriate bag and filter), for the sake of your health. The price is reasonable. If any experts think they know better than me, it's probably true, and I defer to them. Good luck and have fun!
Have fun? With drywall taping and mudding? What world are you living in?
On 10/18/2021 4:09 AM, russell...@yahoo.com wrote:
Have fun? With drywall taping and mudding? What world are you living in?
You make it sound so dry... like Durabond 90! ; )
On Monday, October 18, 2021 at 7:49:56 AM UTC-5, Bill wrote:Then I would party, sort of. Unlike electrical, which I love to do, I just don't get any joy at all out of drywall. I wish I never ever had to hang or patch drywall ever again.
On 10/18/2021 4:09 AM, russell...@yahoo.com wrote:
Have fun? With drywall taping and mudding? What world are you living in? >> >You make it sound so dry... like Durabond 90! ; )
Not sure about dry. But I have sanded drywall dry. But now I like to use a wet rag to smooth the dried mud out. That is much better. As for fun, the most fun I ever had hanging drywall, and taping and mudding it, was when I was all done with the job.
On Mon, 18 Oct 2021 10:08:07 -0700 (PDT), "russellseaton1@yahoo.com" <ritzannaseaton@gmail.com> wrote:job. Then I would party, sort of. Unlike electrical, which I love to do, I just don't get any joy at all out of drywall. I wish I never ever had to hang or patch drywall ever again.
On Monday, October 18, 2021 at 7:49:56 AM UTC-5, Bill wrote:
On 10/18/2021 4:09 AM, russell...@yahoo.com wrote:
Have fun? With drywall taping and mudding? What world are you living in? >>>>You make it sound so dry... like Durabond 90! ; )
Not sure about dry. But I have sanded drywall dry. But now I like to use a wet rag to smooth the dried mud out. That is much better. As for fun, the most fun I ever had hanging drywall, and taping and mudding it, was when I was all done with the
It IS one of the worst jobs - next to wall-papering - - - -
Not far behind is repairing leaking plumbing pipes where there is
always a little bit more water finding it's way to the repair site.
Sometimes it is enough to make me go for a shark-byte.
Once you have the mud up there, you'll do what you have to do to make it >work, one piece of tape or three pieces. Just watch a YouTube video first.
In fact, you may start with one piece, and go back the next day, rip some >off, find that you have three after that. The single thing which immensely >improved the quality of my taping the most was to dunk the paper tape into >water first. After that it got embedded in the mud "real good"! Before I >started doing that, there were places where the tape dried with air gaps.
The single thing I remember learning (from a
"Bill" wrote in message news:RA4bJ.241324$T_8.65219@fx48.iad...Nothing like a Bazooka -- similar to the "banjo" mentioned earlier.
Once you have the mud up there, you'll do what you have to do to make it >>work, one piece of tape or three pieces. Just watch a YouTube video first. >>In fact, you may start with one piece, and go back the next day, rip some >>off, find that you have three after that. The single thing which immensely >>improved the quality of my taping the most was to dunk the paper tape into >>water first. After that it got embedded in the mud "real good"! Before I >>started doing that, there were places where the tape dried with air gaps. >>The single thing I remember learning (from a
Those problems are all but eliminated with a tool like the TapeBuddy... no >wetting of the paper tape is needed and you get a good even coat on the
paper with a little practice.
On Mon, 18 Oct 2021 10:08:07 -0700 (PDT), "russell...@yahoo.com" <ritzann...@gmail.com> wrote:Then I would party, sort of. Unlike electrical, which I love to do, I just don't get any joy at all out of drywall. I wish I never ever had to hang or patch drywall ever again.
On Monday, October 18, 2021 at 7:49:56 AM UTC-5, Bill wrote:
On 10/18/2021 4:09 AM, russell...@yahoo.com wrote:
Have fun? With drywall taping and mudding? What world are you living in?You make it sound so dry... like Durabond 90! ; )
Not sure about dry. But I have sanded drywall dry. But now I like to use a wet rag to smooth the dried mud out. That is much better. As for fun, the most fun I ever had hanging drywall, and taping and mudding it, was when I was all done with the job.
It IS one of the worst jobs - next to wall-papering - - - -
Not far behind is repairing leaking plumbing pipes where there is
always a little bit more water finding it's way to the repair site. Sometimes it is enough to make me go for a shark-byte.
On Monday, October 18, 2021 at 7:49:56 AM UTC-5, Bill wrote:job. Then I would party, sort of. Unlike electrical, which I love to do, I just don't get any joy at all out of drywall. I wish I never ever had to hang or patch drywall ever again.
On 10/18/2021 4:09 AM, russell...@yahoo.com wrote:
Have fun? With drywall taping and mudding? What world are you living in? >>>You make it sound so dry... like Durabond 90! ; )
Not sure about dry. But I have sanded drywall dry. But now I like to use a wet rag to smooth the dried mud out. That is much better. As for fun, the most fun I ever had hanging drywall, and taping and mudding it, was when I was all done with the
"Bill" wrote in message news:RA4bJ.241324$T_8.65219@fx48.iad...Nothing like a Bazooka -- similar to the "banjo" mentioned earlier.
Once you have the mud up there, you'll do what you have to do to make it >>work, one piece of tape or three pieces. Just watch a YouTube video first. >>In fact, you may start with one piece, and go back the next day, rip some >>off, find that you have three after that. The single thing which immensely >>improved the quality of my taping the most was to dunk the paper tape into >>water first. After that it got embedded in the mud "real good"! Before I >>started doing that, there were places where the tape dried with air gaps. >>The single thing I remember learning (from a
Those problems are all but eliminated with a tool like the TapeBuddy... no >wetting of the paper tape is needed and you get a good even coat on the
paper with a little practice.
wrote in message news:eurmmg9togqq01a73uuprf99859cdlq4mj@4ax.com...
On Sat, 16 Oct 2021 18:09:52 -0400, "John Grossbohlin" >><nospam.grossboj@nospam.earthlink.net> wrote:
The host of these videos, Ben, is amusing and irreverent and knows what >>>he's
doing even if he's goofing around for the video. The video on the >>>TapeBuddy
also mentions prefilling and opening up the gaps to do so...
https://www.youtube.com/watch?v=rU1vcqklwoA&t=9s vs.
I can see that it would take a bit of arm muscle for the banjo. This
was a very good tutorial. I'd like to have seen the outside corner
but youtube is big enough to find it elsewhere.
Look at Ben's channel. He discusses the outside corners... steel, paper, >fastening, etc.
Other channels to review are That Kilted Guy, or The Drywall Doctor. They >all offer quality information with some variance in technique.
https://www.youtube.com/watch?v=ojyrmm5jIBI&t=309s
That's really slick. I noticed that he used the quick set chemical >>reaction type mud in the first video and the evaporative stuff in the >>second. Is there a reason for this (either one)?
I suspect it is because the garage job was a quick and relatively small job >and using setting mud would let him finish it in one day. Bigger jobs that >take longer to apply each coat can wait over night for another coat.
He made a comment about not overlapping tape on a butt joint but
didn't say what the alternative was. Just baking sure the tape was
long enough to cover the entire joint? What about ceilings/wall
corners? I also have wall butt joints that go 8'. Perhaps bad
planning but that's how it worked out.
When he says "butt joint" he's referring to the 4' ends of sheets meeting >each others, NOT corner joints at wall and ceiling intersections..they are >corners. Generally, when you hang rock you stagger the butt joints. That
way you shouldn't have a joint longer than 4' (or 4.5').
"Clare Snyder" wrote in message >news:158smg9ldglhcl793ef0kircekmoqtkiog@4ax.com...For sure. When I did my daughter's basement I did all the rocking
On Mon, 18 Oct 2021 17:46:19 -0400, "John Grossbohlin" ><nospam.grossboj@nospam.earthlink.net> wrote:
"Bill" wrote in message news:RA4bJ.241324$T_8.65219@fx48.iad...Nothing like a Bazooka -- similar to the "banjo" mentioned earlier.
Once you have the mud up there, you'll do what you have to do to make it >>>work, one piece of tape or three pieces. Just watch a YouTube video first. >>>In fact, you may start with one piece, and go back the next day, rip some >>>off, find that you have three after that. The single thing which immensely >>>improved the quality of my taping the most was to dunk the paper tape into >>>water first. After that it got embedded in the mud "real good"! Before I >>>started doing that, there were places where the tape dried with air gaps. >>>The single thing I remember learning (from a
Those problems are all but eliminated with a tool like the TapeBuddy... no >>wetting of the paper tape is needed and you get a good even coat on the >>paper with a little practice.
For a pro... yes. For the occasional handyman or homeowner taper not so >much... expense and experience issues.
| Sysop: | Keyop |
|---|---|
| Location: | Huddersfield, West Yorkshire, UK |
| Users: | 296 |
| Nodes: | 16 (2 / 14) |
| Uptime: | 80:54:28 |
| Calls: | 6,658 |
| Calls today: | 4 |
| Files: | 12,203 |
| Messages: | 5,333,309 |
| Posted today: | 1 |
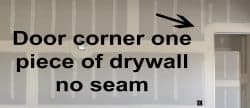