XPost: rec.photo.digital, alt.comp.freeware
Newyana2 <
Newyana2@invalid.nospam> wrote
I tried a few myself.
Thank you for trying that out as whatever we come up with to increase
entropy and paper over unique camera sensor flaws must be easy to do.
It should probably be all done inside of Irfanview, if that's possible.
One way we can probably check our entropy is to pick a photo from the
Internet and then run our commands on that, & then upload it somewhere.
A few weeks later it should make it into the reverse-image-search engines.
Surprisingly they look fine!
I agree. For an upload, they work well (bearing in mind I also resize).
I like that the Irfanview JPG->GIF adds disorder (in the form of collapsing
the unique colors) and then the Irfanview batch reconversion to JPG adds
them back - so the powers that be might not notice it had been done.
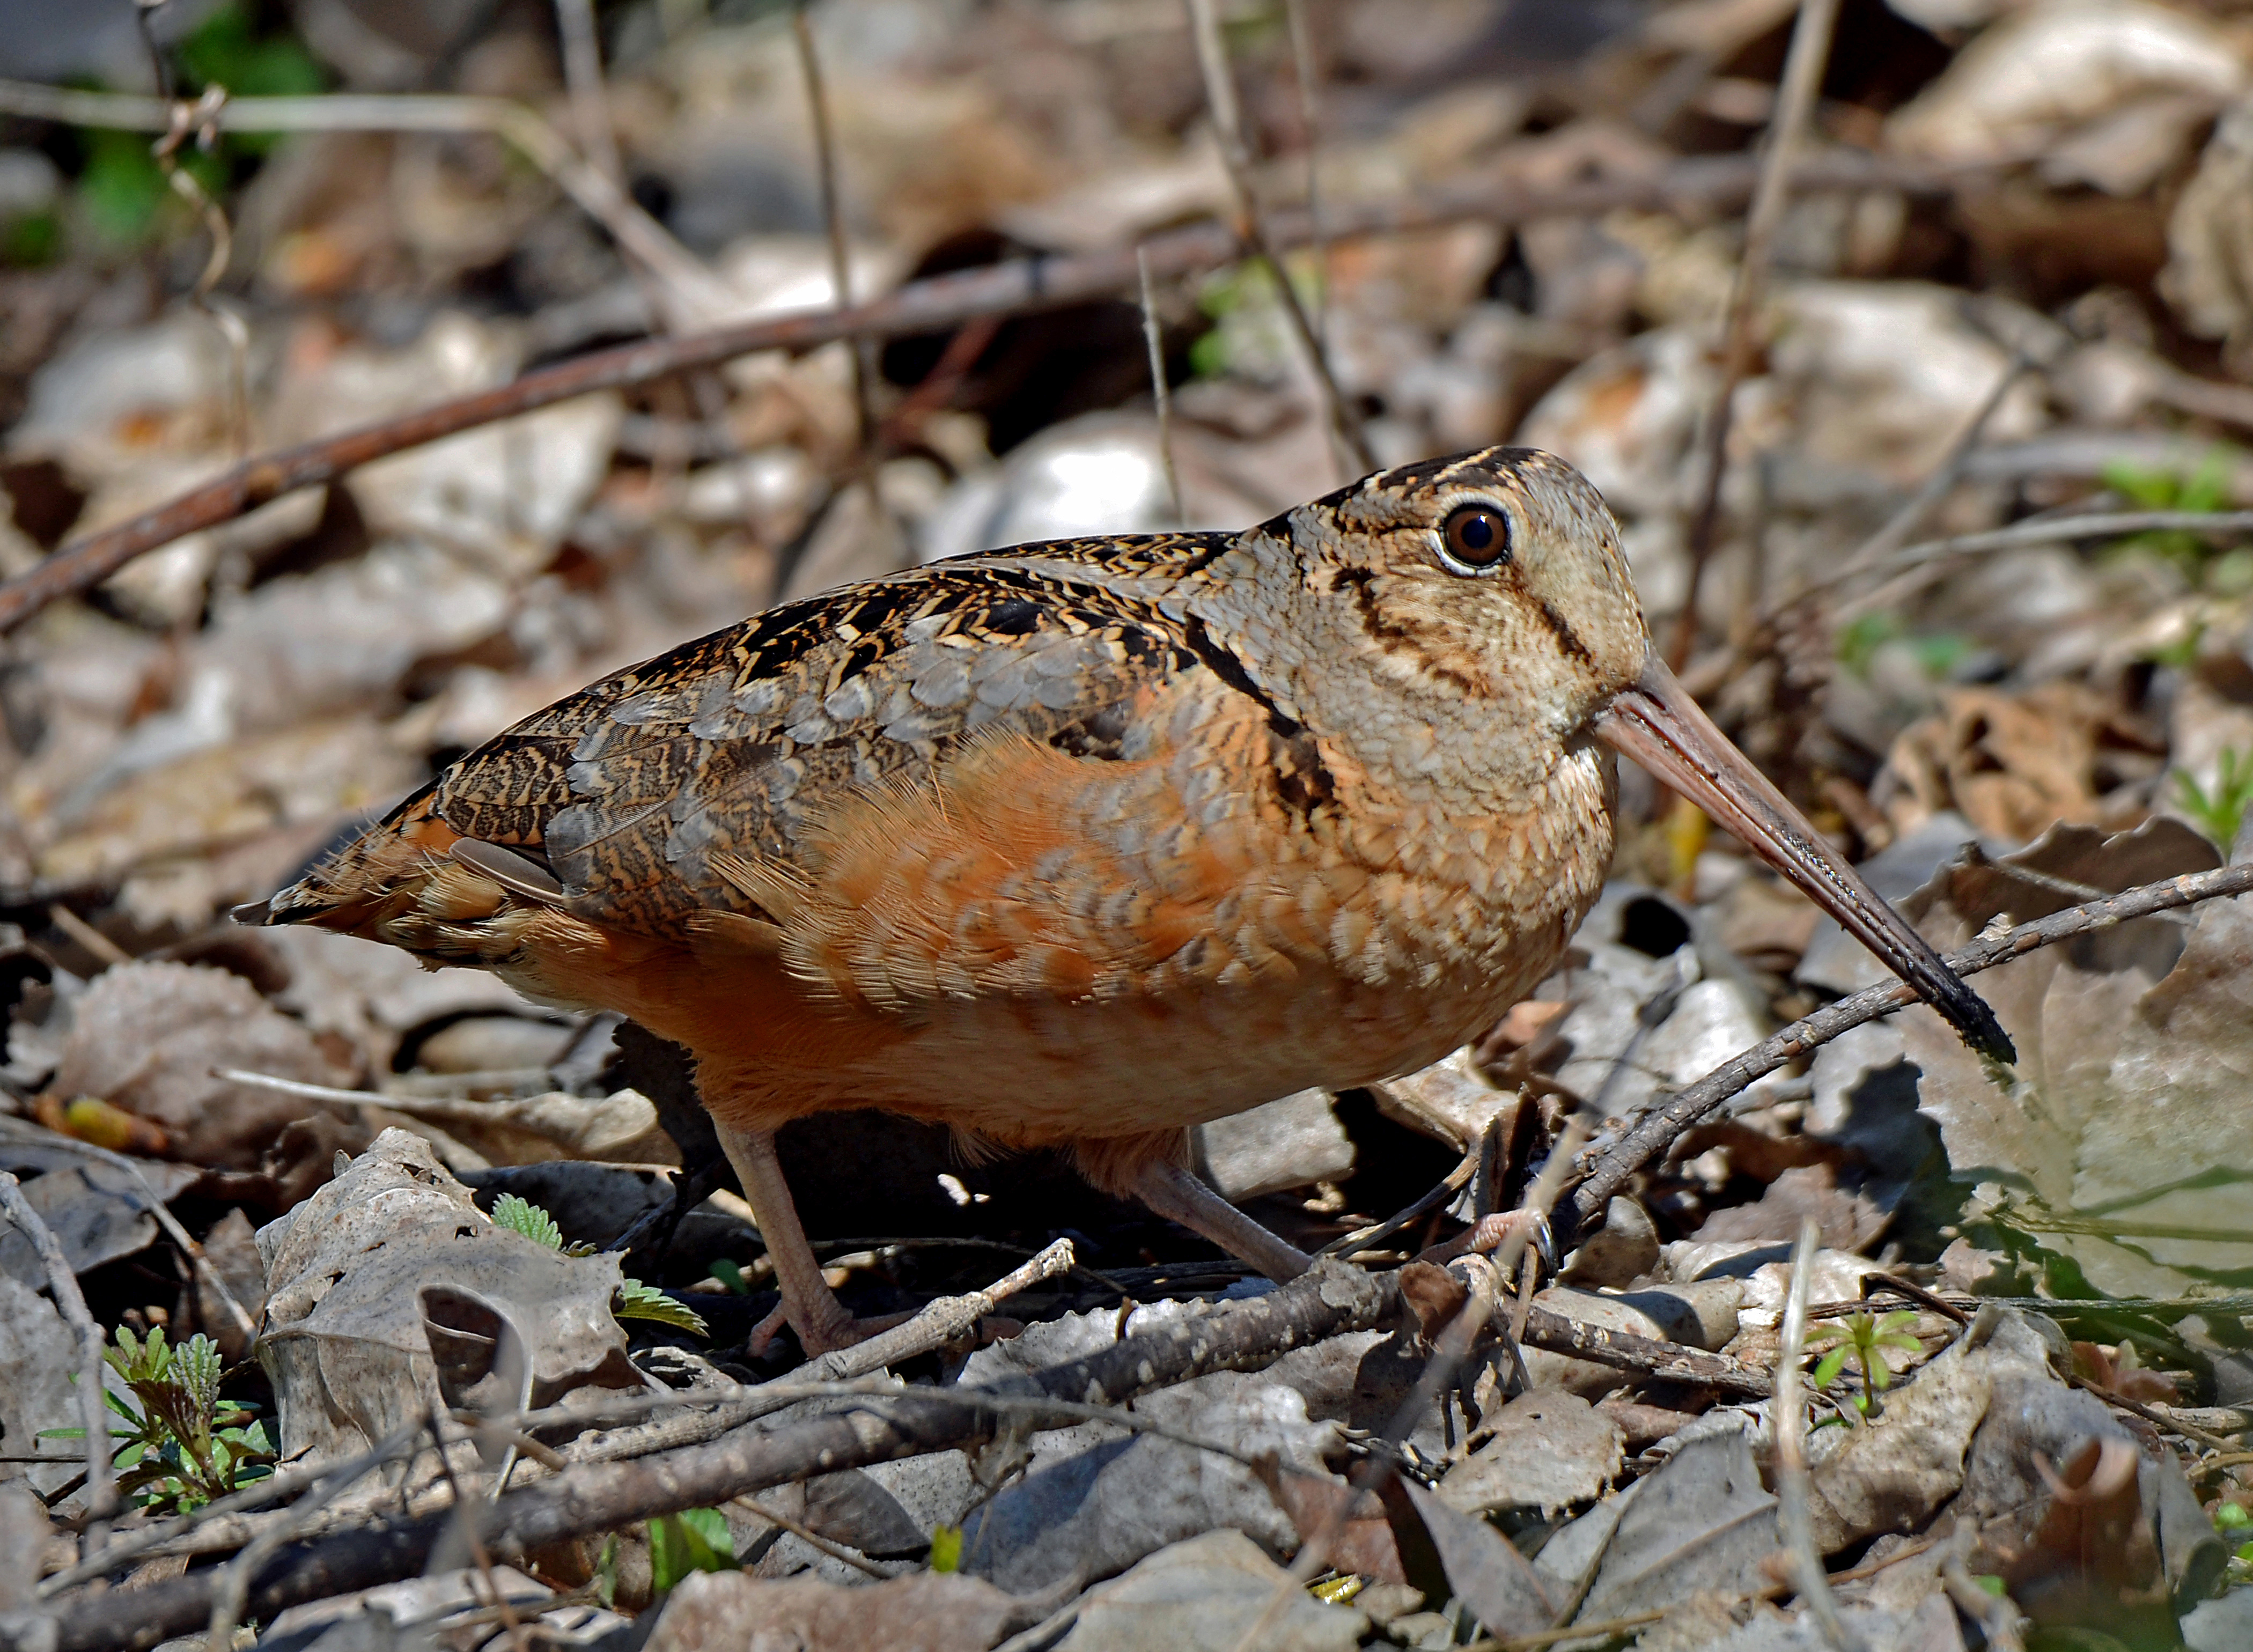
One is a photo of a woodcock sitting amongst greenery. Lots of hues.
Your idea of JPG->GIF->JPG was wonderful, which I had never thought of
before you mentioned it in a couple of posts ago where the conversion needs
to be quick & easy and all done inside of one program, Irfanview.
To that end, I was re-testing your JPG->GIF->JPG ideas this morning (with
more consistent settings, like no compression, cropping, tilting &
sharpening) when I realized there may be two easy ways in Irfanview to accomplish that intermediate GIF conversion of 200K colors to 256 colors.
One way is the way we've been discussing, which is a batch convert of JPG
to GIF to JPG with a resharpen added to greatly increase the number of
colors to a naturally unsuspicious level for typical uploaded JPG images.
But the other way "might" be to just keep it in JPG but reduce the colors Irfanview -> Image -> Reduce color depth -> 256 colors (8 BPP)
(which is what I had been doing that kicked off this original question).
[1] Original photo
Compression: JPEG, quality: 96, subsampling ON (2x2)
Original size: 4000 x 3000 Pixels (12.00 MPixels) (4:3)
Current size: 4000 x 3000 Pixels (12.00 MPixels) (4:3)
Print size (from DPI): 141.1 x 105.8 cm; 55.56 x 41.67 inches
Original colors: 16,7 Million (24 BitsPerPixel)
Current colors: 16,7 Million (24 BitsPerPixel)
Number of unique colors: 219908
Disk size: 4.48 MB (4,693,172 Bytes)
[2] JPG->GIF (using default Irfanview "b" settings)
Compression: GIF - LZW
Original size: 4000 x 3000 Pixels (12.00 MPixels) (4:3)
Current size: 4000 x 3000 Pixels (12.00 MPixels) (4:3)
Print size (from DPI): 141.1 x 105.8 cm; 55.56 x 41.67 inches
Original colors: 256 (8 BitsPerPixel)
Current colors: 256 (8 BitsPerPixel)
Number of unique colors: 256
Disk size: 7.06 MB (7,401,292 Bytes)
GIF->JPG (using default Irfanview "b" settings)
Compression: JPEG, quality: 100, subsampling ON (2x2)
Original size: 4000 x 3000 Pixels (12.00 MPixels) (4:3)
Current size: 4000 x 3000 Pixels (12.00 MPixels) (4:3)
Print size (from DPI): 141.1 x 105.8 cm; 55.56 x 41.67 inches
Original colors: 16,7 Million (24 BitsPerPixel)
Current colors: 16,7 Million (24 BitsPerPixel)
Number of unique colors: 98371
Disk size: 9.17 MB (9,615,126 Bytes)
[3] Reduce colors using Image -> Reduce color depth -> 256 colors (8 BPP)
Compression: JPEG, quality: 96, subsampling ON (2x2)
Original size: 4000 x 3000 Pixels (12.00 MPixels) (4:3)
Current size: 4000 x 3000 Pixels (12.00 MPixels) (4:3)
Print size (from DPI): 141.1 x 105.8 cm; 55.56 x 41.67 inches
Original colors: 16,7 Million (24 BitsPerPixel)
Current colors: 256 (8 BitsPerPixel)
Number of unique colors: 256
Disk size: 4.48 MB (4,693,172 Bytes)
At first I was worried that the Original:Current colors would be a tip off
to anyone looking at the entropy - but they seem to sync up with a save.
[3] Reduce colors to 256 & then save the JPEG & re-open that saved JPEG.
Compression: JPEG, quality: JPEG, quality: 100, subsampling ON (2x2)
Original size: 4000 x 3000 Pixels (12.00 MPixels) (4:3)
Current size: 4000 x 3000 Pixels (12.00 MPixels) (4:3)
Print size (from DPI): 141.1 x 105.8 cm; 55.56 x 41.67 inches
Original colors: 16,7 Million (24 BitsPerPixel)
Current colors: 16,7 Million (24 BitsPerPixel)
Number of unique colors: 98371
Disk size: 9.17 MB (9,615,126 Bytes)
Whoa. That's odd. Very strange. The number of unique colors is exactly the
same for both methods but the file size is double in the JPG->256-JPG
method.
That is, the JPG->GIF->JPG resulted in exactly 98371 unique colors.
But twice the original file size.
And the JPG->256->JPG also resulted in exactly 98371 unique colors.
But the same file size as the original was.
Yet the GIF looks OK.
The goal is for the powers that be to not realize it was done.
Whether I move the unique computer-perceptible flaws (by tilting & cropping
for example) or I paper them over (with blurs & color conversions),
whatever obfuscation techniques we use must have an end result JPG that
appears to be a normal upload (just like those from everyone else).
The only thing left now is to reduce the size as most uploads are
not the full-size image - but some reduced-size image.
[4] Reducing that last JPG->256->JPG with File->Save 80% compression alone:
Compression: JPEG, quality: 90, subsampling ON (2x2)
Original size: 4000 x 3000 Pixels (12.00 MPixels) (4:3)
Current size: 4000 x 3000 Pixels (12.00 MPixels) (4:3)
Print size (from DPI): 141.1 x 105.8 cm; 55.56 x 41.67 inches
Original colors: 16,7 Million (24 BitsPerPixel)
Current colors: 16,7 Million (24 BitsPerPixel)
Number of unique colors: 207697
Disk size: 3.13 MB (3,285,403 Bytes)
Which is interesting because we're now pretty much looking at an image
which is similar in the specs above to the original image in number of
unique colors being around 200K and the file size of around 3 MB.
And as you noted, the color count increases when it's
converted back. Somehow the JPG conversion brings
back some sharpness.
The (JPG->GIF->JPG vs JPG-256-JPG) methods seem to have similar results.
I guess that means if I'm working on a hundred images, I'll use the batch conversion of JPG->GIF->JPG (and batch delete the intermediate GIF).
But if I'm working on only one image, then I'll just employ the
JPG->256->JPG method (instead of creating the intermediate GIF file).
| Why would a sharpen add so many unique colors to the image?
|
Sharpen highlights the difference along edges. If you
take a simple image -- a single color background with
a different color rectangle in the middle, say, a sharpen
will add 1 or more lies of new colors where the 2 colors
meet. In a photo you're doing that with a slightly different
hue for each pixel comparison.
Thanks for explaining why sharpen adds colors by changing the pixels along
the edges of the objects in the image. I don't know what a "resampling" is,
but most images uploaded to the Internet are likely resized where Irfanview turns on resampling automatically with resize.
To check the effect on entropy that resizing has, I just ran this test
on that last JPG-256-JPG->90% compressed image to gauge the effect.
[5a] Resize/Resample [4] -> 800x600 (no apply resharpen)(no compression)
Compression: JPEG, quality: 100, subsampling ON (2x2)
Original size: 800 x 600 Pixels (4:3)
Current size: 800 x 600 Pixels (4:3)
Print size (from DPI): 28.2 x 21.2 cm; 11.11 x 8.33 inches
Original colors: 16,7 Million (24 BitsPerPixel)
Current colors: 16,7 Million (24 BitsPerPixel)
Number of unique colors: 70046
Disk size: 340.72 KB (348,902 Bytes)
That's a reasonable size for a typical Internet upload but let me see what
the difference would be had I done the same steps but with resampling.
[5b] Resize/Resample [4] -> 800x600 (yes apply resharpen)(no compression)
Compression: JPEG, quality: 100, subsampling ON (2x2)
Original size: 800 x 600 Pixels (4:3)
Current size: 800 x 600 Pixels (4:3)
Print size (from DPI): 28.2 x 21.2 cm; 11.11 x 8.33 inches
Original colors: 16,7 Million (24 BitsPerPixel)
Current colors: 16,7 Million (24 BitsPerPixel)
Number of unique colors: 73459
Disk size: 386.02 KB (395,283 Bytes)
Which means the "Apply sharpen after Resample" doesn't seem to change much.
BTW, it must be important to apply the sharpen after the resample because
it's the default for Irfanview.
| But of course, I have no way of knowing if this papers over unique camera
| sensor flaws that were in the original image that moved forward
| throughout.
No. You should have virtually all new pixels, but I don't
know how their method works.
I also do NOT know how their method works (for example, if you flip an
image horizontally, does their method still work?) but from what I've
gleaned over the years, each sensor has unique flaws that they can detect.
If we assume that flaw is a "hole", for example, and if we assume that hole (for arguments sake) is dead center in the middle of the image, then that
one pixel in the middle of the image will be "00000000" (for example).
I can move that flaw to some other spot by tilting and cropping but (unless cropped out) that flaw would still exist with tilting and cropping alone.
I'd have to run another step to paper over that flaw entirely so that it's
no longer 00000000. What Irfanview function do you think can do that best?
| Since the DISPLAY is a BMP, would you think it useful to paper over unique >| camera sensor flaws by snapping a screenshot and replacing it with that?
A screenshot of the desktop? That should give you
just the same bitmap.
Oh no!
I didn't realize that a screenshot gets me the exact same bitmap.
Are you sure?
The reason I ask is not every screen has the same resolution as the image.
So how can it be that they're both exactly the same?
If the image has resolution of, for example, 2X the screen, then how can
teh result be the same since the screen itself can't resolve more than 1X?
I was hoping a screenshot would give me the unique flaws in my screen,
instead of the unique flaws in my camera since the resolution is different.
I should say I don't really understand resolution or DPI so I might be confusing the two because they both seem to be the same thing to me.
A screenshot will just send you the
byte values being sent to the graphic hardware.
This confuses me because I don't know enough about digital images to
understand it.
I'm trying to understand why a screenshot won't help by reducing uniqueness
(as it always seemed to me that it is no longer the original image).
If, for example, there's a "hole" in the center of my camera sensor such
that the middle pixel is "0000000" on the actual image, is a screenshot of
that original image (saved to a new file) also going to have that hole?
| I think we need to fundamentally do a few things, but I'm not sure.
Maybe put it in a locked box, sseal that with wax, then
bury it under your garage floor. :)
The first step in protection is simply knowing what that first step is.
Those who don't know about this issue can't even protect against it.
At least we can try. They can't. So we're ahead of them.
| We need to paper over the unique flaws with blurring somehow.
Are they flaws? Could they be something like particular
hues that can never show up? I don't know.
I also do not know. But I'm aware they're always writing papers on new techniques which work better, so I think the uniqueness of the camera
sensor is what they detect - but they do so via different methods.
I think they're definitely at the point today that any image that isn't modified by the user is definitely traced to the exact camera that took it.
That alone is a certainty. What I do not know is how much (or how little)
of a modification does one need to balance the effort against the results.
Given every picture that's uploaded has to be modified anyway (for sheer
size alone if for no other reason), it's easy enough to add more steps.
without knowing
the method of inspection you're in the dark. But I'm guessing
your method will have changed the precise hue values of nearly
every pixel. So... pretty much a new image that just happens
to look the same to your eye.
I use a combination of steps (most of which have been mentioned but not all
of them) where it's all done in Irfanview (for convenience) and where you
have helped me a lot to understand what Irfanview can do for papering over flaws.
One test I can try is to find a high-resolution photo on the net, and then modify that and post it back & see, if in a few months, my modification
shows up when I do a search on the reverse image search engines.
I could do two images, one as a control (which is not modified), and
another image from the same source (which is modified).
But that wouldn't test forensics so much as how good the image search
engine is (where cropping & flipping foils many image search engines).
--- SoupGate-Win32 v1.05
* Origin: fsxNet Usenet Gateway (21:1/5)